Crocheting bactus is considered an excellent option for home crafts. It is suitable for both gift and personal use. A detailed diagram and description will help novice needlewomen make it themselves.
Simple bactus: master class for beginners
Crochet bactus according to the simplest pattern and description is suitable for beginner needlewomen. Knits in about 6-7 hours. For materials you need to purchase yarn, and for tools - hook No. 3.
Knitting starts from the 1st century. p. The work is done in a fantasy pattern with additions on both sides 13 times according to the motif in 4 rows. When the height of the work reaches approximately 50 cm (or 27 motifs), knitting ends.
What remains is the binding, which is made from 3 tbsp. without nac. in an arc in. n. of the previous line, after the 5th century. p. make a loop without stitching. to the last station without nac. In this way, repeat until the end, making the strapping on three sides.
Crochet baktus (the pattern and description for beginners are very simple) is suitable for training your hands and learning to knit. It is difficult to spoil such a thing, and the materials are inexpensive.
Crochet the edge of the bactus
The final finishing of the edge plays an important role in the creation of any knitted product. Thanks to the wide variety of bindings, you can decorate even the simplest bactus. Moreover, all options are available to beginners.
Some options:
- Rachy step. It is the most common type of strapping. You will need to knit a straight row in a circle st. without nac. Then the crab step is knitted: you need to insert the hook into the second loop, pull the thread out of it, knit the yarn over and close the loop. The rapport continues until the end, the thread is secured and cut.
- Pico. It is often woven in the form of a circle. The first row is cut off at the end, and knitting continues from the first loop in the first row. The second row consists of three columns without nak., one picot. The repeat of the pattern is repeated until the end. The binding ends with st. without tension, the thread is secured and cut.


- Cones. Performed by tying in a circle. The first row is straight or round in columns without nak. Another circle is made up of two c. p., skip the loop of the previous row, then knit a half-column with a nac., grab it twice in the next loop. The five resulting loops are knitted and repeated in this way until the end. The thread is secured and cut.
- Arch. Also done in a circle. The first row is knitted st. without nac. The new one begins with Art. without nac. in the loop of the previous row. Then knit three in. p., two unfinished st. with nak. along with three loops that are on the hook. The 3 loops of the base do not need to be touched. Everything is repeated and ends with a half-column without nak. in the first starting loop. As a result, the thread is secured and cut off.
There are other processing methods, but these are the most popular.
Patterns for bactus
Crochet bactus (the diagram and description for beginners are presented in the article) is an excellent option for training the hands of needlewomen. It can be knitted not only with simple stitches, but also with beautiful patterns.
These include:
- Solomon loops;
- pineapple pattern;
- tiramisu;
- shells;
- twisted columns;
- curls and others.
The simple shape of bactus allows you to decorate it with any kind of patterns. Before you start knitting with a certain pattern, you need to determine for what purpose the accessory will be used. If the item is used as an everyday addition, then a neat openwork pattern will be enough. If bactus will be used in late autumn and winter, then it is better to use tight knitting.
Openwork bactus with a relief pattern
Crocheted bactus looks more attractive with an openwork pattern. The diagram and description are simple and understandable even for beginners.
To knit such a product you will need spinning threads, hook No. 3 and any scissors:
- Initially, a chain of six v. is dialed. etc., and the circuit itself is closed into a ring. Three stitches are knitted. with nak. so that the first art. there will be three in. n. Weaves 1st century. etc., these actions are repeated three times. The VP is not done at the end, but a column with 2 stitches is knitted.
- The work unfolds, after which three stitches are knitted. n., and under v. n. of the previous row, three columns are knitted with nak. They knit right there. p. and three columns with nak are tied here. and again in. p.
- Knitting is repeated until the end of the row, and at the end it is knitted in. p, weaves st. with 2 ac. under a chain of three v. n. bottom row.
- Now you need to connect three c. n., and under v. p. knit 3 tbsp of the previous line. with nak., in. p., 3 tbsp. with nak. Art. are woven under the arc. with nak., 4 in. n. Under v. p. of the previous row, 3 tbsp are woven. with nak., in. p., three tbsp. with nak. After in. p, and under v. p. the bottom line is knitted 3 tbsp. with nak., in. p., 3 tbsp. with nak.
- St. knitted under the arch. with nak., 4 in. p., art. with nak., in. n. and under v. sts of the bottom row are knitted three sts. with nak., in. p, three tbsp. with nak. Again in. p. and similar to the first row, connecting st. with double cap.

- The work unfolds again, and each row will begin with three sts. p., and end with st. with double cap. The first part, center and end should be the same. They are from 3 tbsp. with nak., in. p. and 3 tbsp. with nak.
- The first element is knitted, and after c. p., after under the arch of four in. n. nine st. are woven. with nak.
- Weaves in. p., the central element is knitted from three sts. with nak., in. p. and three tbsp. with nak. On the second side the knitting is repeated.
- The row ends with st. with double cap. The knitting is unrolled and the next row is knitted. Knit three in. p. and the first element. After - in. p, art. with nak. is woven into the first st. with nak. from nine tbsp. bottom row. Weaves in. p. and knit st. with nak. in the next column. The same is done with all nine st. with nak.
- Weaves in. p. and the central element is woven in.
- Do the same on the second side, after which the row ends and the next one begins. The first element is woven and proceed to nine stitches. with nak.
- Art. is woven into the first column. with nak., three in. n., also Art. with nak. skipping 1 column. Then the whole element is knitted to make five sts. with nak.
- Knits in. n. and central element. And after that the second side is made.
- Now we need to prepare the arches for the next nine st. with nak.
- The first element is woven, the st is woven into the first arch. with nak., four in. p. and st. with nak.
- Art. is woven into the further arch. with nak., three in. n., and after art. with a double crochet into the upcoming arch. In the next arch, three stitches are knitted twice. p. and st. with nak.
- Weaves in. p., a st. is woven into the arch in front of the central element. with nak., 4 in. p. and st. with nak. The same is repeated on the second side.
- The row ends and the next one begins. The first element is knitted in it and nine stitches are woven into the arch. with nak.
- It is necessary to link Art. with nak., three v. are woven into the arc. n. After three c. p., knit st. with nak. into the next arch. Rapport is repeated on the second side. Weaves in. p. and an element of nine sts is knitted. with nak. Afterwards it is knitted again. n. and central element. The same goes for the second side.
- The row ends and a new one begins. The first element is knitted, and in those nine lower sts. with nak. knitted one st. with nak. and one in. n. between them.
- Weaving art. with nac., knit three in. p. and knit st. with nak. into the next arch.
- Again - nine tbsp. with nak., and between them one in. n. Weaves in. n. and central element. The second side is knitted.
- Before the first and after the last and the central elements are constantly knitted in. n. After knitting is repeated until the optimal size.
- The work is completed by decorating the scarf to the taste of the needlewoman. The threads are cut and neatly hidden.
Baktus from motifs (grandmother's square)
The work requires yarn and a No. 3 hook.
 Crochet pattern for bactus based on grandma's motif. Description provided below
 Six VPs are cast on, which close in a circle. The next line begins with five lifting loops, three sts. with nak. The third line is woven from five lifting loops, three st. with nak., knitted in two v.p. the last line, and after two v.p. After three tbsp. with nak. in the next two centuries. p. of the previous row, knit two stitches again. n. After – the same thing. Then knit three tbsp. with nak. in two in. n. second row, two v. p. and st. with nak.
The fourth row is knitted in the same way as the third.
The binding is done in lush columns. A lush column is knitted into the first loop, c. p., and in the third loop a st. without nak., there is a lush column, in. p. This is repeated until the end of the edge. Bactus is composed of motifs to the required size.
Crochet bactus with wavy edge
Bactus with a wavy edge is knitted from a wide edge to a narrow one, the result is something like a triangle. The total number of reports must be odd. It is necessary to tie a long chain from c. p. You need to dial 19 rapports and a certain number of c. p., for example, 405. 
For the first row, knit two sts. lifting point, 18 half st. with nak. into all loops of the base, and then knitted with rapports. When the required number of repeats and 1 half-column with nac. is ready, you will need to complete a row of 19 sts. with nak. into all loops of the base.
For the pattern you need to knit a chain in. p. from art. without crochets, embossed columns and half-columns, also columns with 1 crochet. and 2 nak. When knitting, the inner side remains smooth, and the outer side remains embossed. The finished work is tied with half-columns.
Warm bactus
A warm bactus that will look like a shawl is perfect for winter. To work you need a hook and yarn. The square is finished.  Make 100 of these squares. They gather and unite. Then 10 stripes and 10 squares are knitted and 10 strips are joined.
Crochet mohair
Warm bactus of any type can be knitted from mohair. The difference between mohair and ordinary threads lies solely in softness and quality. The pattern should be simple but attractive. This accessory is crocheted. The row is woven from 4 in. p., 2 tbsp. with nak. in 1 loop, 3 ch. 
The next line consists of connecting posts, and in the 2nd century. st. SS behind the back wall of the loop. And so the whole series is woven. This type of knitting continues with alternating stitches. with nak. and row SS - 2 times. Then - a fillet wall from 1 tbsp. with nac., 1st century. p., after - 1 row of connecting st.
An extreme loop is woven in each line. After it reaches the middle (60-70 cm), you need to weave 1 row of stitches without adding. with nak., SS, row st. with nak. The rows are not knitted completely, but as if with decreases. 3 in. weave along the edges. p. with fringe. The parts must be the same. After 140 cm the work is completed. The edge is tied next to st. without nak., line of crayfish step.
Crochet from fine yarn
Knitting starts with four sts. p. with 2 tbsp. in the first of them. An additional three loops are knitted. Connecting art. the next line is knitted. Lines alternate twice. with nak. and connecting art. Now you should knit a row with a fillet mesh. In this case, the columns alternate with c. n. Immediately after this, a row with connecting sts is knitted.
In this way, they complete the work until the middle, and then knit several rows from st. with nak. After completing the above steps, begin knitting in decreasing direction. In this case, three lines are woven along the edge of the product. n. Thanks to this, the work is decorated with a border.
Crochet male bactus
Baktus for men is not much different from women's. You can choose Bosnian knitting. And for such purposes, it is advisable to buy stiffer threads so that the relief and hook No. 2 are better visible. It is also important to consider that the product is knitted crosswise. 
The work is knitted from the narrow part to the wide part, and then decreases. Four in. p., two tbsp are knitted. with nak. in the first loop. After the knitting is turned over, after which the first row is woven with connecting stitches. At the end, knit a v.p. and two connecting stations. Next, a row of columns with caps is knitted, and a row of connecting columns is also repeated.
St. stitches are knitted in a row. with nak. alternately with c. p. They also continue to knit with additions through the row. When the work reaches a height of 60-70 cm, you can start knitting in decreasing order. They do this until there are three tbsp left. with nak.
Baktus for girls
Baktus in children's fashion is used as an addition to the main outfit or headdress. For the pattern, choose a “granny square” or any others. You will need thread and hook No. 2.
Knit four in. etc. and are washed into a circle. Three c. are performed. n. rise, three in. p., three tbsp. with nak. into the ring, again three in. p. and three tbsp. with nak. into the ring, after three v. p. and st. with nak. into the ring.
Continue knitting in the same way, knitting into an arch in the center of three sts. p. three art. with nak., three in. p., three tbsp. with nak., until a length of 50 cm is reached. At the end, make a harness from st. without nac. from a dive.
Japanese
A variety of bactuses offer to link Japanese magazines. This scarf will look great. It is simple and easy to implement.  To make it, you need to follow a simple and understandable pattern. It looks especially elegant thanks to its openwork design.
Unusual bactus “Breakwater”
For such an accessory, you need to knit the corner of the breakwater, which will be created from three parts. Each part includes a different order of additions and decreases. 
Transformer
A transforming bactus can be not only an addition, but also a full-fledged wardrobe item. It is knitted in a trapezoid shape. Thanks to the addition of buttons, it can be more than just a scarf.
You need to knit 4 hundreds in. p., and after three v. p. for lifting. At four in. p. at the beginning five sts are knitted. with nak., alternating them with v. p. Then three retreat. p. and perform art. with nak. Repeat this way until the end.
Knit three in. item for lifting, art. with nak. into the first stitch of a five-stitch fan. with nak., three in. n., column without nak. in the central column of the fan, three in. p., art. with nak. in the outer loop of a fan of five st. with nak., in. n. In this way knit until the end.
Connecting art. you need to climb to the top of the station. without nac. of the previous row and knit according to the type of the first row. The fans are knitted in a checkerboard pattern. You should knit until there is 1 fan left in the center. Then the binding is knitted in the first row from st. without nak., in the second fan. Buttons are sewn on one side.
Bactus is suitable for any weather and event. This accessory is crocheted according to a pattern for beginners or advanced craftsmen. Once you are familiar with the knitting pattern for basic elements and columns, it is easy to knit bactus according to the ready-made description.
Article format: Vladimir the Great
Video on the topic: Crochet bactus
How to crochet openwork bactus:
Not long ago, new triangular scarves called bactus came into fashion. Knitting needles are most often used to make them, but it is no less easy to crochet bactus. The products look beautiful and original. Depending on the chosen yarn, they can be warm, massive or airy, summer.
Not long ago, triangular scarves called bactus came into fashion.
Classic bactus is not burdened with all sorts of details. It is a very ordinary scarf, which is wrapped around the neck. But there are also more original models. For example, by making tassels or pompoms from threads, you can give the scarf a completely different, more sophisticated appearance.
The technique of knitting these scarves can be very different. They can be knitted either with regular double crochets or with openwork crochet. In any case, the product will no longer look primitive.
Another special feature of bactus is that, depending on the chosen color, the product is suitable for men and women. At the same time, the men's scarf is made in strict, dark colors, while women's items are knitted in brighter colors, not always monochromatic.
A bold and unexpected solution is a breakwater scarf or a transformable scarf. This is still the same triangular scarf, but it looks extraordinary. In most cases, it is knitted with knitting needles, but having mastered the technique of making it with crochet, you will be able to create a real masterpiece that will help make the image perfect.
The product looks unconventional, beautiful and sophisticated, in the process of creating which not ordinary, but Solomon loops were knitted. Only initially such work will seem difficult, but after the basics of the skill are mastered, problems with knitting will no longer arise.
Crochet openwork bactus (video)
Openwork crochet bactus with diagrams: diagram and description
Knitting an openwork scarf is a real art. The patterns used here give the product a delightful look. The workflow itself is simple and very interesting.
We knit according to the pattern:
- Cast on seven stitches and perform a double crochet in the very first one.
- Make three air loops and knit a column again in the same place.
- Now cast on three stitches and knit seven stitches into the arch.
- Make eight columns in the next arch.
- Make six loops and knit them in the stitch where the chain begins.
- Cast on another stitch and stitch in the third, fourth and fifth stitch.
- Cast on the loop again and knit one column in the column between the arches.
- Cast on three more stitches and knit a column. Repeat these steps twice.
- Cast on just one stitch, knit the third, fourth and fifth stitch in columns.
- Make an air stitch again and at the very last make a double crochet, three chain stitches and one more double crochet.
- The corner is made by casting three chain stitches and knitting seven stitches.
- Make one chain stitch and in the place where three columns were knitted, knit another one.
- Knit the arch with seven columns.
- Also work one column into the stitch of the bottom row.
- Knit the next two arches in the same way.
- At the next stage, knit six loops and make a stitch in the corner.
- Sew another stitch and skip a couple of stitches.
- Knit the next three.
- Make another loop and a couple of stitches in one of the previous rows.
- Cast on a stitch and skip two stitches.
- Now knit three stitches, a chain stitch and a stitch.
- After this, cast on three more stitches, perform a column, three loops and a column.
- Make one loop again, skip a couple of stitches and knit three columns.
- Make a stitch again, knit a column, three stitches and a couple of columns, repeat these steps again.
- In the future, repeat the pattern starting from the fourth row.

Knitting an openwork scarf is a real art
When the size meets the requirements, tie the product with single crochets.
How to crochet Bosnian bactus: master class for beginners
Bosnian bactus made from sectional yarn is very easy to knit. There are no complex motives or huge, obscure schemes here. But the product looks perfect. Using this principle, you can knit a children's scarf for a girl. The wavy, unusual pattern of the product will suit absolutely any clothing.
Detailed Description:
- Start the work with four chain stitches and two columns in the first of them.
- After this, perform three more stitches.
- Use connecting columns to knit the next line.
- Alternate the lines of double crochet and connecting columns twice.
- Make a row of fillet mesh, alternating columns with air loops.
- After this, knit a series of connecting columns.
- In this way, reach the center of the product, and then perform a couple of lines with double crochets.
- Begin decreasing by working three chain stitches along the edge. This way you get a beautiful border.

Bosnian bactus is very easy to knit
Tying the edge of a bactus with a Tunisian crochet: how to do it
Processing the edges of the product is a very important stage of work. The border not only prevents the scarf from stretching, but also helps maintain its original shape. The easiest way is to tie the bactus with a crawfish step. This method is quite simple and comes down to just a few steps:
- The hook must be inserted into the first loop on the right side.
- Knit a single crochet.
- Now insert the hook into the next loop and knit in the same way.

Processing the edges of the product is a very important stage of work.
Continue working according to the given pattern until the entire product is tied.
Do-it-yourself bactus-charcoal
The scarf received this name not only because of its color, but also because of its special pattern.. The wavy, openwork accessory looks incredibly beautiful. It can be worn both on a cool summer evening and on a rainy autumn. Even in winter, such a scarf will be appropriate.
Work progress:

- Start the work with a set of air stitches.
- Perform all subsequent actions guided by the diagram.
- Make small tassels from the leftover yarn.
- Fix them at the corners.
Baktus: how and with what to wear
The popularity of triangular knitted scarves is due to the fact that they can be used in different ways. For example, the summer version is often used as a top, or they simply cover their shoulders on cool evenings.
There are several variations of using winter bactus:
- attach the scarf to your chest, cross the ends and throw it over your shoulders;
- wrap around the neck and tie the ends, place the corner part in the center or turn to the side;
- throw it over your shoulders and wear it like a shawl;
- cover your head with a scarf and tie the ends at the back.
Crochet bactus: very easy to knit (video)
Bactus is an original accessory, which many people still treat with caution. After all, it is initially difficult to understand how to use it and what clothes to wear it with. But if you wear this triangular scarf at least once, you will hardly want to use an ordinary scarf instead of such an original one. This is a practical, beautiful, versatile product. You can knit it not only for yourself, but also for your husband or child. As a gift for a loved one, such a scarf is just perfect. The process of making this masterpiece will take only a few hours.
Let's take a closer look how to crochet bactus.
Those who love original, stylish accessories are certainly familiar with this mysterious word - Baktus. This is what triangular-shaped knitted scarves are called.
Baktus is a triangular scarf, knitted with garter stitch or crocheted. The length of the bactus scarf in the classic version ranges from 120 to 150 cm and even more. The optimal size is the distance between outstretched arms + approximately 20 cm in order to conveniently tie the product.
The traditional Norwegian bactus was a wool canvas decorated with ornaments. Currently, we can decorate this triangular scarf with whatever we like best: pom-poms, tassels and beads, sequins, etc. – what your imagination tells you.
Baktus is good because it allows you to improvise, create a new image every day, depending on your mood.
What can you wear it with? Bactus is perfect for any type of clothing, regardless of the season. It can be a flirty addition to a jacket or coat, dress, pullover or even a shirt.
The bactus scarf is also universal in that it can be worn not only by women, but also by men and children. This practical wardrobe item will protect you from cold and frost equally well. This scarf-cape will cover your shoulders from the scorching heat in the summer. It can also be worn as a bolero or shawl.
Scarves - baktus, crocheted have now become very popular. They knit up pretty quickly and look very elegant.
Crocheting bactus is easy. You will need at least 100-150g of yarn and a hook. The size of the hook depends on the thickness of the yarn.
You can knit with regular single crochets - simply and tastefully, with an elastic band using single crochets, or with one of the openwork patterns.
If you use sectionally dyed yarn in knitting, you will get an original pattern or alternating colored stripes. The choice of yarn for knitting will depend on the time of year and the purpose of the product; silk, cotton, cashmere and wool are widely used.
Now let's start knitting a simple but quite beautiful bactus together:
Master class “Crocheting bactus”
This fashionable accessory is very easy to knit and a pleasure!
So, to knit such a bactus we will need:
We will knit this simple bactus in one fabric in rotating rows using regular single crochet stitches (hereinafter referred to as sc), grabbing the loops by both halves. That is, we knit one row, unfold the knitting and knit the next row in the opposite direction. We will knit from the corner, gradually making increases to expand - to the middle, then decreases.
To make it more convenient and simpler, let’s immediately define the notation:
VP - air loop
Runway - air lift loop
RLS - single crochet
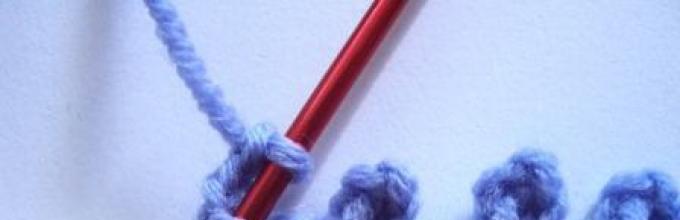
We collect a chain of 4 VPs and connect them into a ring:

We make 1 runway, turn the knitting, and knit 3 sc inside our ring. Next 1 runway, turn the knitting:

We knit the first row - 3 sc + 1 sc increase. That is, we knitted 3 single crochets in a row, and in the last loop we knit not one, but 2 sc at once - this is our first increase. So we got four out of three stitches.

The first 3-5 rows with increases - it’s better to count the number of resulting loops in the row. With each increase you should get 1 more stitch.
In the last loop we put a marker (a paperclip or a thread of a different color - whatever is at hand) so that we don’t get confused - since we will always make increases from one edge - we marked it.


HOW TO MAKE INCREASES
Our bactus will be in the form of a triangle, expanding towards the center. One edge at the top will be smooth without any additions. And the bottom edge will expand towards the center - due to increases.

To make the expansion gradual, we will make increases in every second row.
When we reach the center, having knitted it to the width we need, we will begin to make decreases according to the same principle, so that both halves of the bactus turn out to be a mirror image.
This is how I knitted several rows with increases, and a triangle began to emerge:

When we have knitted the bactus to the width we need (it’s better to try it on and see how many more rows to knit with increases), we begin to make decreases.
We knit a row towards the marker - we have the last three loops left (the very last one is the chain lifting loop of the previous row):

We knit the first two of these three loops together with a loop on the hook (that is, we make the next 2 stitches unfinished, then we pull the working thread through three loops on the hook at once). Of the two columns we got one:


We have one more loop left - the last one - we knit it like a regular single crochet:


I knitted several rows with decreases:


This is how the bactus turned out:

Well, now you already know how crochet a shawl or bactus, and I’m sure you’ll easily knit this fashionable accessory for yourself.
Even loops for you!
Take part in the blog and win a prize!
A woman of any age - be it a baby or an older lady - wants to be beautiful and clothing style plays an important role here. A knitted bactus, crocheted according to a pattern created by yourself, will help. This scarf combines beauty and a cozy look.
Baktus - what is it?
Scarf originally from Norway, handmade. Its classic size at its widest part is from 110 to 160 cm. Previously, in its homeland, it was sewn from pieces of fabric left over from sewing outerwear and decorated with ornaments, fringes or tassels. Now there are a huge number of decoration options - they are limited only by the flight of imagination of the craftswoman.
Baktus make it possible to change images every day - modern styles, romance, country, boho, etc. They can be knitted with openwork patterns from multi-colored yarn, a dense single fabric, from motifs, decorated with ribbon, fur, be warm or from a thin “summer” yarn - the possibilities are countless! Also, the traditional pattern that came from the homeland of bactus - transverse multi-colored stripes - does not lose ground. The shades used are very different - from muted tones to the brightest and most unusual combinations.
Bactus made of openwork fabric is a wonderful option for a delicate and airy look. It will give your appearance uniqueness, modesty and naivety.
Another advantage is the speed of production - 2-3 days and you have a new thing ready!
How to wear and what to combine with a scarf-scarf?
It fits perfectly with any style, regardless of the time of year. It will flirtatiously complement your formal blouse, boring jacket and even a men's shirt or jacket. The bactus scarf is a universal item suitable for both women's and men's wardrobes. There is no need to talk about children - this addition to clothing looks very touching and interesting. The stronger sex also began to use these scarves to highlight individuality and brightness. So, bactus is a unisex thing. Therefore, if it is chosen correctly, it will become very appropriate in the image.

The fashion for this accessory has led to the emergence of a huge variety of models and styles of such scarves.
There is no single option for tying bactus. There are a huge number of original ways to wear it.
A classic of the genre is the placement of an obtuse angle forward, and 2 free corners crossed at the back and also laid in front.
They wear bactus and throw it over outerwear - it looks very picturesque.
In summer they use cotton or viscose scarves - they look great and are also very functional!
Features and advantages of bactus over a regular scarf
This is a practical item in your wardrobe that perfectly protects from frosty winter weather, from the chilly autumn wind, and will save your shoulders and neck on a scorching hot summer day. You can use it as a bolero vest or stole.
When choosing yarn for creating bactus, be guided by the purpose of the item and the time of year. Very often, silk, cotton, wool or cashmere threads are used for these purposes.

For example, for the office, knit it from silk or viscose - “cool” threads will not cause inconvenience. Create a warm accessory for autumn and winter from thick warming yarn, and for summer knit an openwork bactus made of cotton or linen.
Tools and materials
Threads for knitting bacti must be elastic and dense, otherwise the finished product will not be able to keep its shape well. It is advisable to choose yarn containing merino wool, lamb or cotton. It can be mixed, but must contain at least 50% of the above components. Let’s say both 100% merino yarn and cashmere + merino are suitable, in a 50/50 ratio. Experienced knitters willingly use yarn from bobbins - there is much more footage here than when knitting from skeins.

So, take yarn such as:
- merino;
- merino + cotton;
- merino + cashmere;
- lamb wool yarn;
- alpaca + silk;
- various blended yarns containing at least 50% merino/lamb or cotton.
This choice of thread is a basis, but far from an ironclad rule. This is creativity, not a strict methodological process, so experiment and invent, try and create! For example, cashmere has become a discovery for many needlewomen - the yarn is very soft and delicate, you can’t call it elastic and dense, but it looks amazing in bactus - it fits perfectly into the pattern!
Just when purchasing, keep in mind that cashmere thread is much lighter than woolen thread, which means its consumption will differ from the description, and the weight must be calculated in advance.
Also choose the color of yarn for knitting to your taste. You can create a bright, cheerful bactus that will lift your spirits, or you can make a subdued, calm scarf. Threads can be monochromatic or with a transition of colors. If you knit it from 100% cotton or linen yarn, you can wear it in summer.
Crochet bactus - diagram and description for beginner needlewomen
A beautiful mixed alpaca and silk thread is the best choice for creating warm clothes. The product will be warm, soft and delicate to the touch.
Introducing crocheted bactus and patterns. Knitting new items into your wardrobe starts from the side corner. This product can be easily combined with clothes of any style.
The final dimensions of the scarf are approximately 160 / 65 / 65 cm.
So, we need to prepare yarn (75% alpaca lamb wool, 25% silk, 200 m / 40 g), hook number 4.
We crochet bactus according to the pattern, the description is given below.

For a pattern of diamonds, a chain of twelve chain stitches + 3 chain stitches (instep) is made, knitting according to the attached diagram.
Work on crocheting bactus according to the pattern starts from the corner, constantly adding diamond-shaped elements from the fifteenth to twenty-second row and adding loops on one side. Next, we knit in a mirror image, with a gradual one-sided decrease in loops. We tie the finished product with single crochets. We make 2 small tassels and attach them to the corners of the scarf.
Headscarves made from motifs
What a great wardrobe item - bactus! Let's get down to business and crochet a simple openwork bactus according to the pattern for beginner needlewomen!
For this you will need 100% cotton yarn - 170 m / 55 g, hook number 2.

Knit 36 square motifs and 12 triangular ones according to the attached pattern. You can connect them as you work, picking up and pulling the thread through the arches of neighboring elements, or you can sew all the connected squares and triangles using a needle. Steam the finished product and decorate the corners with tassels, pompoms or large beads.
It is not at all necessary to crochet an openwork bactus. The knitting pattern of the motif can also have a dense pattern, therefore the scarf can too.

Tie 42 squares and 14 triangles according to the indicated pattern. You can do this from yarn of the same color, combine several shades in each square, or knit all the squares of different colors - it’s up to you, just choose the combination very carefully so as not to get tacky bad taste. Before sewing everything into one common fabric, be sure to steam all the elements. Now sew with a needle or join using single crochet stitches (let the seam be on the front side), decorate the edges with crocheted fringe.
Schemes of simple bacti, crocheted
The next wonderful triangular scarf is made from cotton and viscose. Knitting in this case goes from the central part in 3 directions. The schematic description contains, in addition to the usual double crochets, also embossed double crochets.

Decoration methods
There are a huge number of possibilities for decorating bacti.
For example, one of these methods is knitting with small beads or using beads. To do this, take thin yarn, thread the end of the thread into a needle, and string all the prepared beads onto it. It is moved aside, and while working, the beads are knitted into the pattern one by one.
Tying the edge of the product with a border - fringe.

Pompoms, tassels, and large beads are attached to the corners of the bactus - in addition to decorative use, they also have a functional role - they weigh down the ends and prevent them from moving out.
Also, the edges of the scarf can be tied with single crochets or fans, and a fringe from the yarn remaining after knitting can be pulled along the entire perimeter.
Crocheting bactus according to patterns is a very exciting and very easy activity that will help you get more than one fashionable new thing!


