We already told you. Today we will learn how to make decorations for paper dresses out of paper, and also mini-dresses using the origami technique to decorate homemade postcards.
Decoration on a paper dress with your own hands
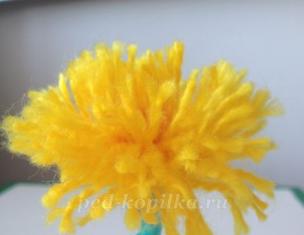
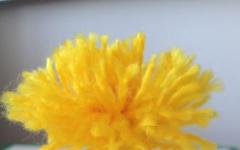
These flowers are quite easy to make and make a delightful addition to any style of paper dress. You can make them from newspapers, colored or just white paper. By the way, you can also use the pages of magazines - the main thing is that the printed lines are on both sides.
For their manufacture we need the following materials:
- newspaper, magazine or any other paper;
- glue (adhesive tape);
- scissors;
- buttons.
First, cut the paper into strips of the same size, for example - it can be 5 centimeters. Fold the prepared rectangular strips together and make many cuts, not reaching the edge by about ¼.

Twist the blanks into a tube, forming a base on one side - pinching it. After twisting, tightly tighten it with tape or glue it with glue.

Gently straighten the top of the flower. And now repeat all the steps with another blank, just do not tighten the base too much - leave room to place the first flower here.

Thread one blank into another, fix everything with glue. If you want the flowers to be more lush, make more layers. You can make the inner layers shorter, this will also add volume.

We glue a button in the middle of the flower - it looks very original and gives the flower a finished look.

DIY paper dresses

Let's find out how to do this pretty dress from paper. With it, you can decorate postcards for March 8, or you can use them to decorate the festive table at a bachelorette party.
It is better for him to take a thin colored paper, since it will be difficult to fold the thick one in several layers. And it is also desirable that the paper be one-sided, that is, have one colored side - it will be more difficult to confuse them in the process.
Wrapping paper with outstanding patterns will look quite interesting. In our master class on making a dress out of paper, we used just such paper.
Carefully follow the instructions in the photo, which shows in detail how to make a paper dress. Keep in mind that if you take paper measuring 10 by 10 centimeters, you will get a dress of about 7.5 centimeters.
First, we fold the paper four times, then we unfold it - we need places for bends. Then we fold our square from two edges and turn it over with the back side.
We fold the resulting workpiece again - we get a narrow strip, the edges of which we then open. The inside of the dress opens before us. We fold about 1.5 cm from the top, after which we fold back the folded corners.
The contour of the future dress begins to emerge. We wrap back the previously unfolded edges, turn the workpiece over and open the hem of the dress. We bend in half, smooth the fold and straighten it again.
With the help of a paper dress, you can stylishly decorate a postcard for March 8, or use it to decorate a festive table, for example, at a bachelorette party. To create such a decor, it is better to take soft and thin colored paper, because thick paper will be much more difficult to bend, folding in several layers. In addition, it is desirable that the paper you choose is one-sided, that is, it has only one color side - so it will be more difficult to confuse them during work.
What materials, besides colored paper, are suitable for creating a dress?
Wrapping paper will also be good, especially if it is of some bright and unusual color. If you decorate a postcard with a dress or festive table, think in advance about combining colors and patterns, and then stock up on material for the production of paper dresses.

Step by step instructions for creating a paper dress
First you need to fold a square sheet of paper in 4 layers, and then unfold it. This will give you the folds. After that, fold the paper square on both sides and turn it over with the back side. The workpiece thus obtained will need to be folded again to get a narrow strip, the edges of which will then need to be opened. So, we see the wrong side of the future dress. Next, bend about 1.5 centimeters from the top, and then bend back the wrapped corners. So the contours of the future dress are already beginning to gradually emerge. The edges that were wrapped should now be unfolded, after which the blank is turned over and the hem of the dress is revealed. Bend the fold in half, then smooth and straighten it again.

Then begins, without exaggeration, "jewelry" work. You should beautifully and extremely carefully bend the “waist”, but at the same time, make sure that the folds on both sides remain even and also the same. Then, you should turn the workpiece over, since the dress is already ready. It is possible to stick it on thick cardboard, then you will have an excellent postcard.

Unusual, homemade dresses, made by hand not from fabric, but from paper, more precisely, from newspapers, are perfect for the role of a Halloween costume or for a party whose theme is related to environmental protection. For such an outfit, you will need several old newspapers, a belt and thin Velcro, as well as sewing supplies. To properly make a pattern, you will need a long ruler with a pencil.

Step by step instructions for creating a dress
Unfold all the newspapers completely, and then fold them in 2 pieces. Do pleating on each newspaper pair. It is necessary to bend the newspaper along the entire length, retreating from the edges by 1.5 centimeters. Then you should turn it over to make a fold about 2.5 centimeters wide. Turn over again, making the fold so that its fold runs just in the middle of the previous one, being close to the first fold. The entire paper structure must be turned over and a bend made on it after 2.5 centimeters.

Advice
It is necessary that the seam touches the previous fold. Next, carefully smooth everything. Continue doing this until the very end of the paper. Pleating is done on 4 newspapers.
Then mark the future waist line on the leaves. And so that your pleating does not diverge, sew it along this line on a typewriter. Take a couple of blanks and put them on top of each other by 1 centimeter, sewing together. Attach a couple of the remaining ones on the sides, slightly lowering down. It will be necessary to let go by 7-10 centimeters, no more. Try on the resulting workpiece, wearing a belt, on the line.

Conclusion:
To make a small, decorative dress out of paper, or to create a full-fledged, creative attire from newspapers, you will need accuracy and a certain perseverance. But, in the very process of creating a dress there is nothing complicated, so the technique can be mastered literally the first time.
Origami - how to make a paper dress
Newspaper dresses
Paper dresses
Interview with Ekaterina Rudenko, the creator of designer paper dresses.
Today our guest is a girl with a very unusual hobby, perhaps you have never even heard of this type of needlework. Ekaterina Rudenko creates amazing dresses out of paper! Yes, yes, these are real outfits for people, not doll clothes! Looking at the photo, it's hard to believe that these masterpieces are based on paper sheets, and not expensive fabrics. Ekaterina gladly told the readers of the site "Women's Hobbies" about herself and one of her favorite activities. Meet and admire!
Ekaterina Rudenko - designer of paper dresses
Hello, Ekaterina, to be honest, we are in a pleasant shock - at first glance, all your paper outfits look like real clothes! Let's get to know each other better, please tell us about yourself.
I was born and live in Anapa - in a small but very famous city. Ideas to do something creative were from childhood. Mom sews, but mostly for herself. I am also friends with sewing machine from the fifth grade. But I always liked not only to sew, but also to design something: interior, dresses, shoes - to create something unusual, not like everyone else. These were some beads, ribbons, flowers. My dream was to become a designer. She entered an art school, graduated from the 11th grade, looked after the institute in St. Petersburg, but her parents did not have enough money. They are ordinary people to me.
So I stayed in Anapa with a dream in my soul. After that my son was born. I immediately entered the university on a budgetary basis with the specialty “tourism manager”, at the same time I studied to be a guide, but I don’t work by education. Unfortunately, my occupation is not connected with creativity now, I work as a sales assistant. In the future, my husband and I are thinking of opening something of our own, we have not yet decided what, but there are enough ideas. While we live with my parents, we are completing the house, we will move in a month, then I will have where to turn around for creativity.

And where did this idea come from - to create clothes out of paper?
The love for paper dresses began like this: in “classmates” I read the status of one girl “we are looking for creative people”, I was required to have one paper dress. I was tormented by doubts: to participate or not, I haven’t done this for a long time, life, work, family takes a lot of time ... A day later I decided to try it, found out the conditions and started to implement the dress. Thus was born the first colorful with white bows.
The process began: I took paper from magazines, compacted it so that it became more elastic, glued it with cut-out pictures from tea stickers, made bows out of white paper. She asked a friend to be my model, put a dress on her figure, sewed a zipper at the back so that it would be comfortable to wear it. Made for fun baby dress for her daughter, it was funny.

In general, it fascinated me so much that now I don’t understand where I had so much time and effort from! Then I decided: I will make not one, but three dresses. The next was a newspaper dress, it is the heaviest, because the corset turned out like papier-mâché. The rest of the outfits are light and airy.
Then it was white with flowers, the base consisted of two cut out whatman paper, a large cutout on the back to make it comfortable to wear, decorated with flowers from napkins, it turned out gentle and light. It takes about a week for one dress.

That means you are well prepared for the competition! And how did it go?
Then it was like this: I sent a photo and waited, I was very worried. They liked my works, but it turned out that there were few people who wanted to make paper dresses, and the organizers of the competition refused. The girl supported me, and so that the work would not disappear, she offered this option: create 10 paper dresses to take a photo shoot.
I was already so involved that I gladly agreed, and it didn’t matter if it was a competition or something else, I was dragged into the process so much that I did what I like. My husband and parents supported me.
 The next dress was a wedding dress made of napkins. I thought for a long time how to do something unusual, magnificent. It consists of a corset and a skirt.
The corset is light, I started to try different paper textures, this time tracing paper came under my hands, I put it directly on the figure, glued it in two layers with white napkins, then with decorative flowers.
Initially, there was a zipper at the back, then I changed it to lacing, so the size became more universal. The skirt is held on the belt, I compact it to make it elastic, I sew two rivets, then I sew napkins on the threads to it, it took about 25 such strands to create volume. Many still do not believe that this Wedding Dress from paper.
And did you manage to make all 10 dresses?
Yes! Next, I “sewn” green from serving napkins (photo above). After I tried colored paper, a bright dress in a square with one shoulder, the process is the same - I put it on the figure, seal it, glue the squares, sew in a zipper and you're done !!!
Having stuffed my hand, I was already putting dresses on my figure. It is very difficult to find paper in bright colors, and I thought about wrapping paper for flowers. So there was a dress with a purple corset, beaded and gold thread, and a gold skirt made of tracing paper, spray-painted, it turned out funny.

Red was next Japanese style, then black with a checkerboard peplum.


The last one was pink and black, the polka dots were made with a hole punch from a paper bag pasted on a black base.
And how was the photo session?
At first, all the photos were amateur. Then my photoshoot took place!!! The sizes approached all the girls, although we had never met anyone before. Of course, it was not easy to transport paper dresses, paper is a fragile material. The dresses are all intact and their life goes on. We plan to do another photo session on fresh air, I think the photos will be brighter than in the studio.
With each birth of the dress, more and more new ideas appeared, I wanted to create. Now there is a short break in my work, but the next stage is ahead, where something new awaits. I am very grateful to those who appreciated my work.

Katya, for sure, readers of the site "Women's Hobbies" already want to try to make a dress out of paper. Would you recommend your hobby to other passionate women?
If someone is looking for himself and wants to try to make a paper dress, try it!!! You will need different paper, tape, glue different types, scissors, threads, accessories (zippers, rivets, laces, beads, etc.), and most importantly - desire, imagination and a little patience! I will be very glad to find like-minded people!
Apart from making dresses, what else do you like to do?
I sew, decorate boots with rhinestones, make numbers out of paper for anniversaries.

Ekaterina Rudenko
Catherine! We sincerely wish you new creative success and endless inspiration that will help you create new masterpieces!
Dear readers! You can get acquainted with all the works (and not only paper dresses) of Ekaterina Rudenko on her page. Perhaps Katya will even find time to create something original to order for you personally!
-
Are you thinking about new home decor? Do you want something unusual and inexpensive? Are you wondering how to unleash your creative side? You might be a little surprised by the next solution: stones. Yes, those stones that you see everywhere, in the river, park, on the beach, perhaps even such things are stored in your home. These stones can make your home look a bit quirky and original. Many people prefer to look for stones with a unique shape or color. But in the following photos, you will see that flat stones can become more attractive as a design for your home. If you have ever collected white pebbles and now don't know what to do with them, draw contrasting trees on them. It looks wonderful, besides, it pleases the eyes Characters from the cartoon Totoro. The painted portraits are worthy of their own exhibition. Looking for a great gift for the family? Here you can borrow an idea and create one of the family members. Love small towns? Just a few stones painted into houses and you are the owner of a whole mini town. You don't need to have great drawing talent to create an amazing painting. Sometimes it is enough to start with one black dot for the imagination to turn on. Beautiful forest creatures. Fauna for your decor. Stones turn into cats. For ked lovers. These beautiful and cute stones can definitely be a gift for your friends. Of course it is
-
We offer you professional photos beautiful girls on the beach with light HDR processing. An interesting observation from the author of the works, in the portfolio at the early stages of his career there were many pictures of sporting events, but as you can see, inspiration and fame came in fashion photography, in which the main objects are the sea, the beach and young ladies. 00
-
According to the mother of a four-year-old fashionista, one day she invited her daughter to create clothes from paper. The girls really liked the idea and they started designing the dresses. Fashion for children Initially, the idea of modeling was 50/50, but with each subsequent design development, Mayhem, as her mother calls her, puts more effort into creating her paper collection. They use a lot of thick paper, sometimes paper napkins, wrappers, gift bags. Also, silk scarves, tulle and aluminum foil are used in the creation of girls' clothes. In principle, everything that can be found in the house is part of the clothes of a young fashion designer. Sometimes Mayhem and her mother found images for designing fashionable whips on the net: +10
Do do-it-yourself paper dress You can, not only replenishing your wardrobe with your favorite dolls. From paper, you can both simulate a future fabric dress, and even make real clothes. Let's take a closer look at examples of what such as a variety of dresses can be.
DIY paper dress
There are different associations with paper dresses. For many girls, childhood favorite entertainment was paper dolls, for which we were happy to invent and draw a whole bunch of dresses. This way of playing has always been easier, faster, more economical than creating for real dolls. In addition, in this way we could express all our imagination and make such dresses that only a top-class seamstress can do. Today, paper dolls are also produced with a whole bunch of ready-made clothes, which, you see, is not so interesting at all. And we will try to fold a beautiful dress from a sheet of colored paper using the origami technique. It can be used in a large composition or appliqué.
Before you is the so-called layout - a scheme for assembling a sheet of colored paper in order to get a simple dress. Pink color for one side of the paper is perfect, which girl does not like pink color. We fold a square sheet of paper vertically and horizontally in half, make folds and then open it again. Pay attention to the arrows of step number 1, you need to fold exactly in the direction they show. Then a sheet of paper needs to be divided into three parts (you can either use a ruler, or determine by eye if you have a good eye), bend the seams. We also fold the outer thirds in half inward and turn the sheet over with the pink side. We now need to bend the upper edge of our rectangle, forming corners in its upper part. Let's flip the shape again. We make the upper corners even half thinner, and bend the sides inward, then bending the lower corners diagonally.

After flipping to the other side, you will see that you have a nice pink sundress. A fairly large number of such origami dresses have been developed, all of their schemes, in principle, are not complicated, they require only care and accuracy traditional for origami. Maybe it has something to do with Japanese traditional women's clothing- kimono, which is a piece of fabric, which, when dressed, is skillfully wrapped up every time, as if an origami figure is folded out of fabric.

The material for such paper dresses can be not only special origami paper, but also ordinary color or newspapers in general. The small black print of newspaper strips always looks like a great print on dresses. No wonder the newspaper print has been used in clothing by designers for many years. And for some of them, newspapers themselves can be an excellent material for creating a spring-summer collection. But more on that later, because we haven't finished with the purpose of our origami dresses yet.
Such dresses, which you see in the photo, are folded, of course, not to be worn by dolls. However, for girls who are sincerely fond of such unusual craftsmanship, such dresses can be useful. They decorate scrapbooking pages in albums, decorate notebooks, postcards and photo frames. What detail will express the mood of warmth, summer, lightness and airiness as well as light dress. You can fold it from plain paper, and develop and apply the print yourself.

An origami dress can be not only one of the decorative elements, but also become the most central element of a handmade postcard. Folding such a dress is no more difficult than the previous one. We also start folding with a square, which we divide into four parts by horizontal and vertical folding. Now we divide the figure not into three parts, but into two, folding the halves to the center and again. Let go after all the verticals are well bent. On the dress you will get such a pleating effect. We fold it as shown in the picture, combining the first beat with the third, and so on. to get a figure with two central lobes and one side each, all the rest are bent. We turn the part over and bend the strip from above horizontally. We release the sides of this bend, forming the corners. We bend the sides to a vertical line in half, turn the figure over. We bend the corners of the hem to get a beautiful neckline and the skirt has acquired the correct shape. We make two folds in the middle of the dress, fold it with an accordion. At the waist, you got the corners that need to be bent in order to form such a correct waist line, which you see in the example. We paste the finished dress on a sheet of thick cardboard, supplying with all the necessary decorative elements.
DIY paper dress master class
Origami dresses can actually become real holiday clothes for your favorite dolls. But, of course, not the usual folding, but. It is with the help modular origami we will make beautiful do-it-yourself paper dress, master class in folding which is not too different from similar crafts.

To begin with, let's remember how the most basic modules are formed - triangular. It is on their folding that large volumetric figures of modular origami are most often based. Before stacking a certain number of modules, you need to read the recommendations for collecting and step by step instructions for each specific shape. The modules can be of different colors, but their shape will be unchanged, it is she who allows our triangles to stick tightly to each other due to the force of friction. In addition, with the help of such triangular modules, it is possible to increase or decrease the circumference of the craft with each row, which leads to a change in shape.

We can assemble such a craft right on the doll in order to better understand the proportions and exactly where to increase or decrease the rows of modules. We start the dress with a vicious circle of modules, which we build up on top with another row. After that, the circle is turned inside out in the other direction, so that by inserting the modules, the dress grows up, and not to the sides. Now it's up to building more and more new rows up. If you wish, you can insert modules of a different color, which will make patterns on the surface of the craft. Starting from a third of the height of the dress, begin to gradually reduce the rows, inserting one of the modules at once into the previous two. By the way, if you need to increase the number of modules in a row, you will have to insert two modules of the new row into one module of the previous row.

For creating beautiful dress you can combine the modular origami technique with. In the dress shown in the picture above, in the technique of modular origami, fluffy skirt, and the top, belt (which closes the transition from one material to another) and decor in the form of autumn leaves are made of multi-colored corrugated paper.
This craft would be good for the competition autumn crafts, and just to decorate your favorite doll, create a new original outfit for her. If you want the doll to be able to take off her dress, then it is better to fix the entire craft with glue so that the modules do not crumble during careless movement.
DIY paper dress master class
A dress for a paper doll can be sewn in the same way as a dress made of fabric. True, and paper in this case is not suitable for any. If you are fond of scrapbooking, then you know that the paper used for page design is very elastic, durable, it is very convenient to fold and model it. IN do-it-yourself paper dress master class, which you see in the photo, is made from such paper from the Pion Design series.

For cutting, exactly the same patterns are used as for fabric dresses, but we won’t sew them together with threads, but use glue. Various techniques allow us to make both pleated collars and puffy, layered skirts. Delicate lace, which adorns every dress, you can also easily buy in any specialized department - this is a special braid for scrapbooking. Such dresses can be made by studying the history of the costume, put clothes on your dolls different eras and arrange real luxurious balls.
Do-it-yourself paper dress step by step mk
We have already talked about corrugated paper, it is, of course, very delicate and looks great on a dress, but because of its thinness, this material is rather fragile. You can avoid risks if you make a frame, and then put a corrugated paper cover on it, as in this delicate composition. Let's talk about how to do it do-it-yourself paper dress, step by step mk and advice on formation is also not to be missed.

As a frame, it will be most convenient to use foam plastic - a material that resembles foam plastic in its properties, but less granular. It cuts great stationery knife and glued on. We take a small doll, we cover it with pieces of foam plastic to the waist to hide the junction of the foam plastic frame. We decorate the bottom of the dress with frills, you can also add satin ribbons and other decorative items.
Step-by-step mk, do-it-yourself paper dress

If all the last time we have been talking about doll outfits, this does not mean that paper is suitable only for such crafts. Although this material is not very strong or durable, however, from time to time, designers delight us step by step mk paper dresses. DIY Of course, making such beauty is not easy, but if you learn how to “sew” from paper, you can create some vivid images for a costume party.

For dresses, it is not necessary to use expensive paper with various additives that give the material greater strength, glossy shine, and the like. An interesting outfit can be made from newspapers. And these are not simple origami dresses that we have already considered with you, but a completely unbanal newspaper dress that can be worn even on a solemn occasion.