Master class "The Pincushion" "Firebird"
Tolstopyatova Iraida Anatolyevna, teacher of the MADOU “Sorceress”Labytnangi, Yamalo-Nenets Autonomous Okrug
Purpose: Making such works develops creative imagination in both children and adults. This handmade pincushion made from discs will serve as a wonderful gift and will make you smile and good mood with family and friends.
Purpose: This master class is intended for older children, preparatory group 5-7 years, as well as for educators, teachers additional education, parents and all interested people.
Tasks:
To instill in children the ability to carefully perform the operations of making a needle bed, while showing diligence. Learn to cut out a body pattern with scissors, trace it onto cardboard, carefully cut out the body of a bird from cardboard, flowers from velvet paper or soft plastic, and glue the parts correctly. Develop creativity children. Develop imagination, fantasy, memory, fine motor skills, develop children's speech and logical thinking.
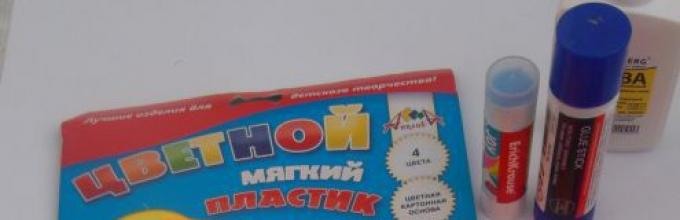
Vocabulary work: Activate the words in children's speech: Soft plastic, pattern, details, sequins, weave paws.
Ready-made pincushion “Firebird”
Material:
1. Scissors
2. Cardboard, velvet paper
3. Glue
4. Soft plastic
5. Threads
6. Sequins
7. Discs

A pincushion is a useful thing in the house. In every family, there is often a need to mend something, sew on a torn button, or carefully patch up some loose seam. There is no need to talk about needlewomen; we simply cannot do without needle cases. Agree, it’s convenient when the necessary needles and pins are always at hand, they don’t fall anywhere, they don’t get lost, they’re all pinned into the soft pad of the pincushion, from where it’s very convenient to take them, and returning them to their place takes a matter of seconds.
So, I suggest you make an original pincushion, the materials for which you can easily find at home. The work is expected to be exciting, but not at all difficult. You can make a pincushion with your children.
Congratulations to mommy(L. Kazakova)
I congratulate my mother
I wish you a happy holiday.
I'll make it for my mom
Whatever I want.
I'll clear my table
I'll wash the toys
I'll make the crib
For a friend's doll.
Together with the Nina doll
Let's bake cookies.
Even from plasticine,
But it's a treat.
Our gift to mom
We'll put it on the table.
Together with the Nina doll
Congratulations to mommy.
Work progress
1. Prepare required material for making a needle bed.

2. Using threads 50 cm long, weave a braid for the bird’s legs


3.Cut strips 1.5 cm wide and 20 cm long, of different colors, the strips should be the same color on both sides.

4.Glue the ends of the strips together so they look like droplets.

5. We glue these droplet strips in a circle onto the disks, alternating colors.

6.Glue the braided braid, form a loop for hanging and straighten the braid for the bird’s legs.

7. Cut out the body of the bird from cardboard, glue on the eyes and nose.

8. Glue a tuft of ready-made balls to the top of the head.

9.Glue a sponge cut in a circle to the middle of the body.

10.Glue the second disk and glue the finished body to the disk.


11. Decorate the disk with flowers, decorate the bird’s tail with sequins.


12. Heat - the bird is ready. To give your mother your firebird, you can also read a poem.
Gift for mom(A. Passova)
I'm a gift to mom
I started drawing
The sun came out
And invites you to go for a walk...
Sun,
Sun,
Don't be angry!
Better sit next to me.
Mom's holiday once a year
I'll draw and go! OK?
Vases with flowers
I'll draw it in the album
Bouquet of wildflowers,
It will become more festive in the house,
The light of the sun will immediately flash.
I'll paint it carefully
Corolla, stem, petal,
To become brighter and more beautiful
Every little flower.
This vase of flowers
I will give it to my beloved mother.
*******
I am sewing a toy for my mother.
From a colored scrap,
I'll cut out the tail and ears,
I'll stuff the sides with cotton.
Do you recognize? It's a cat!
I'll paint his mouth.
I'll give a kitten to my mother,
He will live with us.
As you know, no house can do without a needle. But, unfortunately, they can easily get lost and pose a danger to others. To prevent such troubles from happening, it is better to get a pincushion, and, moreover, own production. It’s nice when this piece of furniture looks unusual and aesthetically pleasing, delights others, and inspires the owner to new achievements in the field of needlework.
Of course, you can buy a pincushion in a store, but a handmade product will never compare with the purchased product. And the variety of ideas for pincushions is so huge that every needlewoman will be able to choose a model to suit her taste. In addition, this extremely important item of sewing accessories is often made from leftover fabric, lace, a piece of felt or scraps, which does not require any special costs. But the process of creativity and creation small work art will bring a lot of pleasure and positive emotions.
The selection of today's material describes various ideas for making needle beds, ranging from the simplest and most basic to more complex and elaborate products.
The master classes and recommendations for creating needle beds presented in the article will make the process simple and accessible even for beginning craftswomen. Thematic selection of photos and detailed video The lesson will definitely inspire you to create a new masterpiece in the form of a home pincushion.
By the way, this handicraft item is perfect as a gift or present for any representative of the fairer sex.

While sewing, it is very convenient to have a pincushion on hand to prevent the loss of a needle or sewing pins. Pincushions come in a variety of sizes, textures and shapes. It could be a simple pillow, a tied mushroom or cactus, or it could be an elegant hat or a stylish mannequin. In this case, it all depends on the desire, skill and availability of the necessary materials.
Simple DIY needle beds
Perhaps the simplest will be pincushions - pads that are easy to make without any patterns or special tools.
You need a piece of fabric, filler (sintepon, cotton wool) and a needle and thread. But even in such light hand-sewn needle cases, there is room for flight of fancy. By sewing on buttons, beads or beautiful braid, embroidering initials or making a rosette from a thin ribbon, you can completely transform a model of a pincushion that seems so simple at first glance.

Here is the simplest example of making a round needle bed:
- a circle is cut out of cardboard (for the stability of the future pin stand);
- a piece of fabric is prepared larger size than a circle of cardboard; slightly tightened with a simple seam along the edge of a circle of fabric;
- a padding polyester is placed in the fabric, and a cardboard circle is placed on top;
- Having connected the parts (you can additionally glue the fabric to the cardboard) with stitches by hand, fix the product around the cardboard frame;
- The pincushion is decorated with beads, beads, and thin braid.


A variation on the theme of a round pincushion will be “pumpkins” or “flowers”.

This model does not require a cardboard circle. Two round parts of the same shape are sewn together, stuffed with soft material and decorated with large stitches. At the end of the work, decorate with improvised means (a beautiful small button, a bright ribbon).

Another interesting and convenient device for a seamstress would be a needle bed with a fixing tape on the arm. This can be a thick thick elastic band or Velcro tape.

Such pincushions can be of different shapes: round, square, heart-shaped or, more complexly, in the shape of an animal, handbag, shoe.
Pincushions made in the shape of ladies' hats look original and elegant. Making them is not at all difficult, and the result will exceed all expectations.
DIY “hat” pincushion
Let's consider step by step wizard class of unusual pincushion “Hat with polka dots”, made by yourself:
- Prepare a cardboard circle and a circle made of fabric twice as large - these are the future brims of the hat.
- Carefully fix the fabric on the cardboard circle, making even folds.
- Cut out a second circle of fabric equal in size to the cardboard pattern.
- We place a small piece of padding polyester inside the fabric and sew it together.
- We connect two parts (you can sew or glue).
- We decorate the pincushion hat with a ribbon with a bow and small flowers (you can use beads, seed beads, decorative ribbon bows and artificial small flowers).
- In 30-60 minutes you get an excellent device for needles and pins.

By changing the color or fabric of the product, you will get a completely new and beautiful masterpiece that you can admire endlessly. If desired, you can create hats different styles: gentle and aristocratic or modern and sporty. There are actually a lot of options. The main thing in this matter is to show your imagination and realize your plans.


DIY pincushions from a jar
Many needlewomen, when making needle beds, use improvised means such as jars. The jars are chosen whole, small, and, if possible, beautiful. But ordinary small jars of mustard or baby food. The main thing is to skillfully decorate the container and turn it into a “helper for a seamstress.” What is the convenience of such needle beds?

And the fact is that the jar, in addition to a pincushion, also serves as a storage place for small buttons or beads. Thus, the dual purpose of the product is fulfilled: practicality and beautiful appearance.

Let's consider detailed master class for making a pincushion from a jar with your own hands.

You will need a jar with a lid, thick fabric for the pad, decorative elements(linen ribbon, lace, paper flowers, silk ribbon), padding, glue, cardboard.
- Jar with lid the right size, wash and dry.
- Prepare a pincushion for decorating the lid.
- To do this, cut a circle of fabric (twice the diameter of the lid) and a cardboard circle (equal to the diameter of the lid).
- Put a little synthetic padding or padding polyester and a circle of cardboard for a strong fixation ( detailed instructions given in the description of making a round needle bed).
- Using stitches, firmly tighten and fix the fabric around the cardboard circle, while pressing the padding.

- Glue the finished pad to the lid of the jar (you can lightly sand the surface in advance for a tighter fit).
- Decorate the jar with braid and ribbons using special glue.

To ensure that the jar remains functional, when decorating it, you should not seal the junction with the lid. It is enough to decorate the pad on the lid, for example, with an embroidered patch and matching braid.

If the manufacturer does not pursue such practical goals, the jar can be completely decorated, changing it beyond recognition.


DIY felt pincushions
A very popular material in modern needlework is felt and felt. Soft and pleasant to the touch, easy to sew, felt in crafts looks bright and original. Pincushions were no exception: products in the form of animals, plants, and household items cannot fail to evoke a smile and tenderness among others.
Current models will be cacti, whose needles will visually replace sewing needles and pins. This pincushion looks natural and is very easy to make.


- First, you need to cut out all the parts of the needle bed from felt.

- You can make the pattern yourself or use an approximate version, doubling it and printing it on a printer.
Approximate pattern of a do-it-yourself pincushion “Cactus”

- On finished parts you need to leave seam allowances.
- Sew all the parts, turn them inside out and fill them with some soft material (foam rubber, cotton wool, remnants of fabric or thread).

- Connect the parts to obtain a whole product.

- Decorate a cactus with a felt flower bright color, for example, burgundy or red with a button instead of a core, and the pincushion is ready!

Felt is a durable non-woven material with a soft, felt-like structure. It is very easy to work with because its edges do not fray and do not need to be further processed with an overlocker. It bends perfectly, glues, and has no back or face. And crafts made from felt are soft, slightly fleecy and very pleasant to the touch.
That is why felt pincushions have a kind of “homey”, warm atmosphere of perception and create real comfort in the home.


These funny and cute pincushions can be sewn from pieces of felt. By the way, the task is greatly simplified by the fact that now handicraft stores sell felt in small pieces, especially for crafts. And the color range is so diverse that you can easily choose the right shades, combining and combining “as your heart desires.”
DIY book pincushion
You can also make pincushion books from felt. They turn out to be very roomy and unusual. Well, everyone can decorate and transform such a “book” at their own discretion.
The main thing in such pincushions is to think about what the main frame will be made of and what decorative elements will be used. The book can be either whole or divided into halves, sewn by hand or on a sewing machine. A fundamentally important condition is the presence of soft felt in the middle of the book so that the needles can be easily fixed in the needle bed.
Pincushion books, the endpapers of which are decorated with embroidery, are popular. This unusual solution for a pincushion makes it look like a real mini-book or notebook. The design for embroidery is selected to be small, compact, and ornamented. Most often these are plant and floral motifs. The book is usually held together using silk ribbon. On the inside of the book, felt is either glued or sewn.


Thematic decorative elements used to decorate the “title page” (a pin, miniature scissors or a spool) can be easily purchased at specialized handicraft stores. Such details refresh the craft in their own way, giving it an individual character.

The clasp for a pincushion book can also be made in the form of a loop and a button. There can be two or more pages in such a “book”, depending on the need. They can be made entirely of felt or partially glued onto the base material.


The applique on the pincushion book is a stylish and fashionable decorative element.

If you don’t have felt on hand, you can sew a pincushion of this shape from another material: cotton, cotton or linen.
With this shape of the pincushion, it is convenient to take it with you when you go away or give it to your child for labor lessons. All sharp needles will be safely hidden in soft book. This is one of the main advantages of such a needle bed; all other models have an open look.


One of the most complex, but also the most attractive, is the mannequin-shaped pincushion. Graceful figures are often made in a romantic, vintage style, which makes them seem even more sophisticated and delightful.
Do-it-yourself pincushion “mannequin”
Such pincushions are made in full silhouette or on a footstool, using a variety of additional accessories. A beautiful hand-made pincushion, in addition to its direct purpose, will become a real interior decoration. Materials you may need are silk, velvet, corduroy, cotton, flannel, tulle and a variety of stylized accessories.

In order to protect yourself and your loved ones, you need to carefully monitor the location of needles when sewing. In this case, you cannot do without a needle bed, which you can make with your own hands.
How to make a pincushion in the shape of a hat
To make the so-called house for needles, we will need:
- textile;
- thick cardboard;
- padding polyester;
- threads;
- needle;
- scissors;
- glue;
- decoration for a hat.
Let's start making a cute pincushion:
- Using thick cardboard scissors, cut out a circle. Depending on the diameter of the circle you choose, this will be the size of your future needle bed.
- Using fabric scissors, cut out a circle twice as large as a cardboard circle.
- Cut out a circle of fabric the size of a circle from cardboard.
- Wrap the cardboard circle in the cut out fabric.
- Using a needle and thread, we cover the cardboard circle with fabric, making equal folds. The base of the hat is ready, set it aside for a few minutes.
- Let's start making the second part of the hat. We put padding polyester on the second fabric circle.
- We sew the edges of the circle, we get a soft ball.
- We connect two parts using thread and needle or glue.
- We decorate the hat with any decor, for example, ribbon, flowers, beads, etc.
The funny hat is ready, it will take about 20 minutes to make.
How to make a pincushion from a jar
To make an unusual pincushion from a small jar we will need:
- small jar;
- textile;
- thick cardboard;
- padding polyester;
- threads;
- needle;
- scissors;
- glue;
- decorations for the jar.
Let's move on to creating a soft ottoman from a can:
- Thoroughly rinse and dry the jar.
- Cut out a circle with the diameter of the lid from cardboard.
- Cut out a circle from fabric twice the diameter of the lid.
- We lay padding polyester on the cut out fabric circle.
- Baste along the edge of the fabric.
- Insert the cardboard circle into the inside of the pillow.
- We tighten the pad and secure it with a knot.
- Glue the soft pad to the lid.
- Let's move on to decorating, choosing decorations to suit your taste.
The pincushion from the jar is ready! You can put your sewing kit or personal items in the jar itself.


How to make a felt pincushion
To create a stylish felt pincushion we will need:
- paper;
- felt in several colors;
- threads;
- needle;
- padding polyester;
- pencil;
- button.
And so, let’s move on to creating a felt pincushion:
- We draw patterns of the pincushion parts on paper or print them from the Internet.
- On felt we trace the outline of the pattern.
- We cut out the details of the pincushion from felt, namely a cactus, a cactus shoot, a flower, and pebbles.
- Sew 2 flowers one to one and sew a button in the center of the flower.
- We sew together the identical parts of the cactus, leaving a small hole so that we can then fill it with padding polyester.
- We sew felt pebbles and fill them with padding polyester.
- We sew a shoot, a flower and stones to the main cactus.
The felt cactus is ready! To complete the image you need to stick real needles.

How to make a pillow-shaped pincushion
To sew an original pincushion we will need:
- textile;
- padding polyester;
- threads;
- needle;
- pencil;
- scissors;
- hot glue;
- beads.
Let's start sewing the pincushion:
- Draw a circle on the fabric with a pencil and cut it out.
- We fold the two cut out circles with their front sides one to one.
- We baste them in a circle, retreating 5 mm from the edge.
- Sew two circles.
- We make a cut in the middle of one of the circles.
- Turn it right side out and fill the pillow with padding polyester.


- We sew up the previously made incision.
- We thread a long thread into the needle, stick it in the center from top to bottom and draw it from under the bottom to the initial position, tighten it with force. We stick it back in the center, this must be repeated several times. With these actions we divide the pad into sectors. The number of sectors depends on your preference. At the end of dividing into sectors, you need to tighten and make a strong knot.
- In the place of the knot, at the intersection of the threads, beads of various sizes should be glued. The pillow-shaped pincushion is ready! It takes a minimum of time to make such a practical pincushion, and the result will surprise you.

A pincushion is an irreplaceable thing in a housewife's arsenal. You can create it yourself from various materials. Having a needle case in the house will provide convenience when sewing and prevent the loss of such a dangerous tool.
Do-it-yourself needle bed: photos, diagrams, master classes, very easy and beautiful, we tried to collect all this just for you in this article. The pincushion part is created not so much for a practical purpose. The decorative component plays a role, being decisive. I want the pincushion to not just be a place for needles, but to be pleasing to the eye.
The shapes can be very different, but in this article we have collected the simplest and most understandable master classes on how to make a needle bed easily and quickly with your own hands. A large number of photographs will help to better understand the basic manufacturing process of the product.
Photos, do-it-yourself needle bed diagrams
From a can
What you need:
Small jar (suitable for baby food);
Glue gun (you can just use super glue);
Filler;
Cardboard;
Upper fabric;
Ribbons, flowers for decoration;
Needle, thread, scissors;
You will need to cut a circle out of the fabric and match it to the diameter of the lid: the circle should be twice its size. Sew simple seams and pull together, add filler.
Cut a circle out of cardboard that will be exactly the same size as the lid. Place filling and tighten with thread. You will get a pillow that needs to be carefully secured to the lid with glue.


Now take a strip of fabric, glue its edges together, turning it inward. Glue the rim around the can in the pad area. There should be no space left between the two types of fabric. Decorate the side by sewing ribbons or lace, and additionally decorate the lid itself with flowers, beads, and buttons. In the jar itself you can store buttons and other small items for needlework.

Made from fabric in the form of a hat
What you need:
Cardboard and fabric;
Ribbons and decorative flowers, ;
Compasses, scissors;
Decorative needles, needle and thread;
Glue and filler for the pincushion;
If you look at the photo, making a needle bed with your own hands using this scheme is extremely simple. A 10.5 cm circle needs to be cut out of cardboard. Cut two circles from the fabric with a diameter of 14 cm and 22 cm. Take a large circle and put a circle of cardboard in the middle, trim it around the perimeter, making beautiful folds.


Place filler in a circle of fabric, connect the edges of the fabric and sew. Now sew two parts of the hat, as shown in the photo. All that remains is to tie ribbons around the crown, secure them with pins, and pin the flowers. The pincushion is ready! There is more that can be done.


Pincushion chair
Enough interesting option products. Inside the chair you can store the needles themselves, or you can put various little things for needlework.
What you need:
A piece of thick fabric;
Scissors and cardboard;
Filler;
Glue;
Transfer the details of the chair that are in the pattern photo onto the fabric (don’t forget to leave room for seams). You will get two parts for the back and four for the sides of the chair. Cut everything out and pin it together with two pins.


Next, sew the material along the curved edges. Cut out parts from cardboard following the pattern diagram. There will be one piece for the back and two pieces for the sides. Turn out the sewn fabric parts and steam the seams. Now insert cardboard into the parts and fold the chair, sewing all the parts together.
Wrap the front part of the product with fabric and sew on the sides. All that remains is to make a cardboard box. The bottom is made from a 7.8 cm square and 4.5 cm deep. Turn the side parts outward and then insert them inside the chair.

Next, cut out three squares of 8 cm sides and wrap one with fabric. Cut the same squares from the filler, place them on cardboard and make a seat. All that remains is to cover the seat and secure the edges with glue. Glue ribbons on top. Fasten the ends of the tape. You will get a chair with a secret box in it.
In the form of a comb
You can make a pincushion with your own hands very easily and beautifully. different forms. For example, give it the shape of a comb. The work requires threads and scissors, a needle, filler and felt. Take a regular comb and trace it along the contour of the fabric.

Two parts are made of fabric and one of filler. Now the oval of filler is sewn to the main part of the comb, then you can add more filler if required. Next, sew the two parts together.
From felt
Any figures cut out
A pincushion is a cushion or case for storing needles and pins. Working with it eliminates the possibility of losing these sewing accessories during the needlework process. Today you can buy a pincushion in any store, but it’s much nicer to make it yourself.
This piece of furniture, made with your own hands, will delight all family members and serve as a source of inspiration for the hostess.

Materials you can use
A pincushion is an indispensable assistant for any needlewoman. Today there are a large number different options this kind of accessories, differing in size, shape, and materials.

What can you make a pincushion from? Any improvised or discarded items are suitable for this purpose: scraps of fabric, lace, leftover felt, etc. The main thing is to come up with an unusual idea, and you will find the materials to bring it to life.


Simple pincushions
Of all the patterns for sewing needle beds with your own hands, the simplest is considered to be a cushion-shaped needle bed. To create it, you do not need any patterns or special tools.

You will need a scrap of fabric, stuffing and a needle and thread. But even when making such a light piece of sewing accessories, you can show your imagination.

Sewn buttons, beads, beautiful braid, embroidered initials, flowers made from ribbons - all this can transform such an ordinary needle case.

Pincushion hat
Here are instructions on how to make such a pincushion with your own hands:
- Prepare a circle of cardboard and a circle of fabric, the second one should be twice the size of the first. These are the brims of the hat.
- Fix the material on the cardboard circle, carefully forming folds.
- Cut out a second circle of fabric. Its size should be equal to the size of the cardboard pattern.
- Place a piece of padding polyester or cotton wool inside and sew the fabric.
- Connect the two parts of the hat with glue or thread.
- Decorate the product. You can use ribbons, beads, beads, bows. The pincushion is ready!

If desired, you can make hats in different styles– classic, sporty, rustic, modern.

Pincushions made from cans
As you can see in the photo of the original needle cases, many craftswomen use jars to make such sewing accessories. Containers should be intact, small, convenient and beautiful. The most important thing here is to skillfully decorate the jar, turning it into a “girlfriend” for the needlewoman.


The advantage of this model is the following: it is not only a stand for needles, but also a storage system for buttons, spools, beads and other small items.
Felt pincushions
Felt and felt are ideal materials for making homemade souvenirs, including pincushions. Such crafts depicting animals, household items, and flowers look quite cute and funny, bringing smiles to others.

The most popular model is the cactus in a pot. Every housewife can make such a thing, especially since there is more than one master class on the Internet on how to make a pincushion in the shape of a cactus. And the product looks simply wonderful.

Pincushion-book
Let's consider one of unusual ideas pincushions with a description, namely a book-shaped pincushion. It can also be sewn from felt. But you can use other fabric. The main thing is to correctly decide on the material of the main frame and choose the right decorations.

The book can be made whole or it can be divided into two halves. In addition, such a pincushion can be sewn by hand, or you can use sewing machine. It is of fundamental importance to have a piece of felt in the middle of the book for more secure fixation of the needles.

Knitted pincushions
Pincushions, crocheted or knitted ones are in no way inferior to their sewn counterparts. Colorful, unusual knitted figures of animals, birds, plants and mushrooms can be a very interesting place for needles and pins.

If you have high skills and abilities, you can knit a real work of art that you won’t be ashamed to show to friends and colleagues.
Pay attention!


In conclusion, we note that absolutely anyone who has basic skills in handling a needle and thread or a crochet hook can make an original and unusual pincushion.

Since a homemade item is always better than a store-bought one, from a needle stand self made it will work out wonderful gift for birthdays, weddings, name days, New Year etc.


DIY pincushion photo


Pay attention! 


Pay attention! 


