Sewing and patterning a carnival "bunny" costume for the New Year's party in kindergarten. Pattern of a bunny costume for a child approximately 3 - 4 years old.
This cute bunny costume is suitable for both girls and boys. Your baby will be comfortable throughout the holiday in this costume! Try sewing it yourself.
You will need:
* white or silver satin – 160×150 cm
* pink fleece - 40x35 cm if the suit is for a girl, if your bunny is a boy - the shirtfront and ears can be cut from a fabric of a different color (for example white)
* decorative braid - 180 cm
 *
zipper - 25 cm
*
zipper - 25 cm
* 2 pieces of wire 18 cm each
* padding polyester
* rubber
How to cut and sew a bunny costume:
1 Cut out the parts from the atlas according to the diagrams of all patterns from 1 to 8, all along the outer contour. Don't forget to leave a 1cm seam allowance.
2 From fleece, cut out the shirt-front according to pattern 2 (shown in pink) and the ear parts according to pattern 7 (shown in pink).
3 Sew the side seams by pairing the front pieces with the back pieces (in diagrams 1 and 2, the stitching points are shown in blue). You got the right and left  parts of the costume.
4 Make step seams (they are marked in green in diagrams 1 and 2). Sew the center seam on the front and back (in diagrams 1 and 2, the stitching points are shown in yellow). At the same time, when sewing a seam on the back, leave 25 cm unstitched at the top - for the zipper.
5 Sew the stand and shirtfront, focusing on diagram 2 and photo. Sew a braid along the edge of the shirtfront. Sew in a zipper.
6 Sew the seams of the sleeves and sew them in. Hem the seam allowances on the legs and cuffs, leaving 1 cm unsewn. Insert an elastic band into the resulting drawstrings.
7 Sew pink ones to the two white ear parts. Sew the braid along the edge of the pink ear (see photo). Sew another white piece to the back of the finished ears, leaving the bottom edge unsewn. Insert a wire along the edge of the ears and stuff them with padding polyester.
8 Sew the sides to the top of the hat (in diagrams 3 and 5 the seams are shown in orange). Sew the back of the head, inserting the ears (in diagrams 3 and 4, the place for the ears is shown in lilac). Make a drawstring around the edge of the hat, like on the cuffs, and insert braid or elastic.
How to sew a New Year's bunny costume for a boy with your own hands?
The easiest way is to sew shorts and a vest.
If possible, it is better to buy a piece of faux fur in gray or white, either velor or velvet will do. If you need a simpler option, then any fabric, only white or gray.
The shorts can be cut according to any child’s shorts, if the fabric is thick or fur, then add a little volume (along the side seams) - 1-2 cm. Gather the top with an elastic band.
Shorts can be easily replaced with just white, gray, or black trousers.
A tail is sewn onto the shorts.
The same vest can be cut using a shirt, T-shirt, etc. as a basis. child.
A shirt of higher colors than those indicated is worn under the vest.
The headdress is the most important thing that distinguishes the costume.
Masks and bunny ears are quite well presented in stores.
But you can make it yourself.
The simplest thing is to take a headband, wire for the frame of the ears, sew the ears, and connect everything.
Or sew a hat according to the pattern in the photo:

Suits, overalls, like this one, for example, like in the photo:

sewn according to the overalls pattern. The pattern can be found in fashion magazines, for example in Burda, etc.
You can see the pattern here:
Here you can watch a master class on sewing such a suit:

Here's a simplified version of the costume:

Here, in the photo, the fur is replaced with tinsel, which is not bad:

Bunny costume in gray tones (here, in addition to shorts and a vest, there are fur arm sleeves):

New Year's bunny.
The bunny costume requires white fur. From it you need to sew a hat with ears, as well as a collar, mittens and steal boots. You need to sew a black nose with antennae to the hat. You can also use a ready-made hare mask, but then sew the hat without ears.
A white shirt, white pants or shorts, and on the chest make a bright-colored applique, for example, a carrot or a vest. The look is very impressive if you sew it from colored fur, because the bunny is all soft and fluffy. And finally, attach a small white tail (a lump of fur) to your pants.


Of course, the easiest way is to buy a ready-made costume, but if you put in a little imagination and effort, your homemade costume will be even more original.
So, take a white or light gray turtleneck. From orange fabric we cut out a carrot cone, from green fabric we cut out a carrot tail. And sew it onto the turtleneck. You can buy ready-made toy carrots and decorate the top with them.
For the bottom shorts: black (almost everyone has them, or you can buy them inexpensively) or white. The main thing is the tail. It is better to make it from rabbit fur, or from a piece of faux white fur. Sew to the back of the shorts.
There is a vest - great. We trim it around the edge with shiny tinsel.
We put white shoes on our feet; if desired, we decorate them with rain or trim them with white fabric.
You can either use inexpensive store-bought ears on your head, or you can sew them like this:
We find a pattern for a cap or hat. The ears are sewn into the seams of the headdress. You can insert a hard lining into the ears and attach them to the cap instead. After this, the ears are sewn to the headdress.
That's it, the super bunny is ready to gallop throughout the matinee!
In order to make a bunny costume for a boy, you first need to find a pattern. Here are two more suitable patterns:


Then you need to buy fabric and cut out the details of the future suit using the pattern.
All that remains is to carefully sew everything together and decorate it with additional details.
The bunny costume is great for New Year's parties for boys. Sew overalls for a boy from faux fur according to the pattern. You can buy plush fabric.

If it’s difficult to sew a jumpsuit, then you can make a bunny costume from shorts and a T-shirt.

To make such a costume, you can take white fabric with a small pile and sew a vest and shorts with a ponytail. You can buy bunny ears with a headband and attach them to a white hat. Details of the process can be seen in the video.
Here's how they suggest sewing a hare costume in one magazine:

Here is another video clip from the master class:
I propose to sew another suit like this. In the example, a girl is posing. But for a little boy, I think a suit would be fine too.
We take a white T-shirt and pants as a basis.

Cut out a circle like this from pink felt. You can use a disposable plate as a template. (For a boy, you can take blue fabric.)
Glue the circle to the T-shirt and sew along the edges:


We sew a pompom to the pants, this will be a tail.

You can buy the ears ready-made, or you can attach them to the headband.
All that remains is to paint face painting on the face.

In order to sew a bunny costume and go to Santa Claus for a matinee, we will need a pattern for a vest, pants, a tail and a hat for the bunny.
Let's use them.

This pattern is for gray material.

Pattern for white material. We cut out the parts and sew them together.
Usually, you need to bring a child to a New Year's party dressed in the costume of one or another animal or fairy-tale character. Unfortunately, not every family can afford the additional costs of such an outfit. The way out of this situation is to make your own bunny costume.
Basic requirements for a suit
Before starting work, you need to have an idea of the essential characteristics and elements of the future outfit. These include:
white color, since we are talking about celebrating the new year - the period when hares acquire this color;
characteristic protruding ears;
small fluffy tail.
All these moments should make the boy look like a bunny.

Choosing a costume concept
The most traditional version of this outfit is a faux fur suit. The undoubted advantage of this version is its uniformity. However, there are also disadvantages, the main one of which will be discomfort from being in the suit for a long time, since it is too warm.
An alternative option involves limited use of fur. It will only be needed when creating the ears and tail. The main part of the suit can be made from velor or white knitwear. In this case, the boy will be comfortable, and the presence of long ears will not allow anyone to doubt that this is a bunny outfit.
The outfit can be a jumpsuit or consist of several elements (pants, jacket and hat). The first design is used, as a rule, in the manufacture of fur options, and the second is applicable for light outfits.

Tools and materials
To create a bunny costume, you cannot do without a sewing machine. It is advisable that she has an overlocker to create decorative elements of the outfit.
When sewing you will need the following materials:
white fabric for the main part of the costume;
white threads with a needle;
a piece of thick cardboard;
white faux fur;
elastic for trousers and cuffs;
paper and marker for making patterns;
padding polyester;
a small piece of black felt for the eyes and nose and thread of the corresponding color.
This list is not exhaustive. If parents want to add additional details to the outfit, other materials can be used.
The process of creating a bunny costume
The manufacture of the outfit will be demonstrated using the example of a composite version, due to its greater comfort and simplicity.
First of all, you need to sew the pants. The work consists of the following stages.
Creating a pattern. You can use your son's sweatpants for this. The result on paper should resemble them. After this, it is necessary to cut out pieces of the base material that must correspond to the outlined sample.
Sewing fabric elements. Using a machine, smooth seams are created at the points of contact of previously created pieces of material. Separate seams are made at the waist and at the bottom of each leg. It is necessary to insert elastic bands into the formed channels.
Creation of decorative elements. The tail is made from a round piece of fur with an approximate diameter of 10 cm. It should be sewn around the perimeter and pulled together. After this, you should get a hollow sphere, which needs to be filled with padding polyester. The finished ponytail is sewn to the back of the pants, slightly below the waistband.
The resulting trousers must be tried on the boy. If they fit, you can proceed to sewing the upper part of the suit. The simplest solution would be a vest, since it does not require sewing sleeves.
As with the bottom of the suit, you need to start with a pattern. It can be made using a boy's T-shirt. As a result, you should get 3 parts of the material: a large element for the back and 2 front parts of the future vest.
When stitching the resulting pieces of material, it is important to ensure careful movements. This will make the vest as flat as possible.
The edges of the vest can be decorated using an overlocker, or by making a fur edging. There are options with buttons, but their presence is not necessary.
The final part of the costume will be the cap, on which decorative elements are located. Its base can be made using a pattern taken from a child’s regular knitted hat. It is important to leave holes in it for attaching the ears.
The ears themselves are made from faux fur. Patterns for them can be made using stencils of an oblong object (iron or telephone). Thick cardboard must be placed between the resulting parts so that the ears do not bend. Once ready, they should be inserted into the holes on the cap and sewn.
The eyes and nose can be made from felt. It is important to track their correct location by making the appropriate marks on the cap. These elements are sewn on with threads of the appropriate color (black).
The finished suit should sit comfortably on the boy and not cause inconvenience in movement.
Making a New Year's outfit for a child is not so difficult. Even parents who are inexperienced in sewing can make their son happy if they strictly follow the instructions.
Bunny suit size 86 - 92 cm for a boy
Consists of:
· Hat
· Cape
· T-shirt with shoulder fastening
Shorts with chest straps
· Felt boots.
Required:
· White suit fabric - an old jacket was recut, but the cost is about 30 - 35 cm if you buy a new one.
· Faux fur on a knitted basis - 40 cm
Calico - 40 cm
· White knitwear - 40 cm
· Doublerin - 10 cm
· Elastic band 2.5 cm wide white - 34 cm
· Elastic underwear - 30 cm
· Decorative buttons - 4 pcs.
· White flat buttons - 2 pcs.
· Bias binding white - 60 -70 cm
· Plastic buttons - 2 pcs.
Patterns used:

Shorts
1.Pattern.
Having measured the length on the child from the waist to the desired size, we put this value along the side seam on the pattern of the front and back halves. I got 25 cm. From this mark we draw a line parallel to the bottom line.
Modeling the front half. We transfer one dart from the pocket to the waist line: we lengthen the first dart by drawing a straight line from its center down (blue line). At the waist, from the center, place a perpendicular line until it intersects with the dart extension line (red line).

We cut along the blue and red lines, not reaching the intersection angle of 2 mm and close the dart.

We apply burlap to the pocket and cut off the size of the second dart from the waist to the hips.

2. Lay out all the parts on the fabric and cut them out, taking into account an allowance of 1 cm along all seams except the bottom - 2.5 cm along it.
3. Fold the front half so as to connect the dart marks at the waist and sew the tuck straight down to a length of 8 cm, making a tack at the bottom. We pin and stitch the darts on the back half.
4. Sew the side and crotch seams, iron towards the front half, and overcast.
5. Place the trouser legs one inside the other with right sides inward and pin them together, connecting the cuts along the waist line and along the middle seam. If necessary, trim the unevenness of the middle seam and waistline.

6. Stitch the middle seam and process the seam allowance.
7. We trim the belt. It consists of two parts. We measure the distance between the tucks on the front half - this will be the central part. And we measure the waist from the tuck, along the back half and to the second tuck - this part of the belt will have an elastic band. The width of the belt is calculated from the diameter of the button. I have a diameter of 2 cm.
Width = 2dstitch + 1 cm + 1.5 cm + 2 cm (allowances) = 8.5 cm.
8. Duplicate the central part of the belt. Iron both parts in half and attach a wide elastic band to the seam allowances of the larger part. We connect the parts of the belt so as to leave a slot for the button, making sure to make fastenings.

9. Sew the waistband to the shorts.

After trying it on, it turned out that the shorts were quite loose in volume and drooped, so I had to rip off the waistband and take 2 cm from each side seam and re-stitch them. I also cut 2 cm off the balance of the shorts. I didn’t re-stitch the back darts, I just removed them, but I lengthened the front pintucks. Accordingly, I measured the belt at the new waist and took a little from the length of its back part. I re-sewed the belt to the shorts, and, making sure that everything was fine, continued.
10. Sew off the side seams and the front tuck. Fold and stitch the bottom.
11. We process the free edge of the belt using an overlocker or zigzag. Fold the waistband in half and stitch, aligning the button holes. On both sides of the slot, on each loop we lay a finishing stitch, fastening the halves and fixing the loop. Then we sew the belt in a circle at the bottom of it, making sure that no elastic gets under the seam. We secure the loops on top with a small zigzag for strength.

12. We trim the chest for shorts - cut out a rectangle from the main fabric measuring 30 x 16 cm. Pocket - measuring 12 x 16 cm. For the straps, measure the length along the back from the waist over the shoulder to the waist in front (balance measurements Dts and Dtp). I got 58 cm. The width of the strap in the cut is 8 cm. The length of the strap with allowances is 60 cm.
13. We process the top edge of the pocket into a hem and stitch it to the breast rectangle on three free sides. We divide the pocket in half into two entrances, laying a line.
14. Bend the breast in half, iron it and place a finishing stitch along the fold. We bend the straps in half lengthwise, connecting the sections and iron them.

15. Turn the breast inside out and connect the outer and inner parts of the breast.

16. Connect the straps to the breast, leaving a 1 cm allowance from the edge of the strap, place the breast and stitch along the side seam.

17. It is necessary to check the width of the breast by placing it against the waistband of the shorts. The loops should be located in the center of the straps.
18. We bend all the allowances of the straps, ironing them. We sew the strap along the entire length from the inside of the breast.

19. We sew the straps around on all sides. We sew buttons - finishing buttons on the front, simple ones - from the inside of the belt on the back, retreating 5-6 cm from the middle seam.
20. Try it on the child again and pin the free ends of the straps to the belt. At the place of the chip, mark the level of the loop. We put a notch where the tail will be located.
21. Sew out the loops and fasten the chest to the shorts.

22. We cut out an oval measuring 10 x 13 cm from the fur in the most protruding places, retreating 1 cm from the edge, we lay a free line on the machine or stitch it. We collect a tail, inside which we put padding polyester or scraps of fabric.

23. Sew the tail to the shorts by hand so that the pile faces up (for fluffiness).

Felt boots
Although I chose the largest size, when I placed the child’s foot on the footprint, it turned out that it would not be enough for us either. I increased the length of the trace by 2 cm simply by moving the pattern along the fabric. Next, we measure the length along the arc of the new footprint, divide the result in half and compare it with the upper part of the shoes, which should be sewn to the footprint. To increase the size of the toes of the upper part, I also lengthened it by 2 cm.
1. We cut out felt boots, 2 parts from fur, directing the pile down, and 2 parts from calico for each leg. We additionally cut out the footprint from some kind of cushioning fabric, perhaps a thin insole or leather. I have a polypropylene backing for linoleum (I have a piece lying around). Allowances on all sides are 0.7 cm.
2. Randomly cut out heels and toes from calico to finish the sole.

3. We baste the trim to the fur tracks; you can additionally place pieces of padding polyester inside for relief. And we sew them off with a small zigzag.


4. Sew the front and back seams of the boot from fur and from the lining, leaving 4-5 cm in the back section of the lining for turning inside out. We cut out corners on convex areas, not reaching the cut, and on concave areas we make cuts. Iron the seams.

5. Sew the spacer to the calico sole and connect it to the upper part. We also connect the fur upper to the sole.


6. To prevent the boots from falling off, we sew a drawstring to the lining in the shin area and insert an elastic band into it.
7. We connect the lining and the upper part along the upper cut. And then we fasten the soles.


8. Turn the shoes inside out through the hole and sew it up.

cap
1. We cut out two parts from fur, taking into account the directions of the pile, and two from knitwear (I still have one from a T-shirt). Ears 2 parts made of fur, 2 parts made of calico. Allowances are 0.7 cm everywhere, except for the allowance at the bottom of the fur part - there is 3 cm for the bend.
2. Assemble the lining, starting with the darts and leaving an opening of about 5 cm for turning inside out.
3. We also collect the fur from the darts, cutting them to the very end and carefully ironing them through a cloth.

4. Ears. We connect the fur and calico with the right sides inward, stitch it in a circle, leaving a hole at the bottom for turning it inside out. We cut out the corners and turn them inside out.

5. We attach the ears to the fur base according to the marks on the pattern and sew the hat.

6. Connect the lining to the top.

7. Turn it inside out, sew up the hole by hand and sew on a bomb (it’s made like a ponytail).


Cape
1. We connect the pattern of the front and back of the T-shirt along the shoulder and trace it onto paper from the middle of the back - along the neck of the back, along the neck of the front, mark the line of the shoulder and its end. In the resulting diagram, measure 13 cm from the neck down, beautifully rounding the line to the middle of the neck of the shelf. We increase the neckline by measuring 1 cm. To ensure that the cape does not stick out over the shoulder, remove 1 cm from the shelf and back to the end point of the shoulder.
2. We cut out the shelf and back from the lining and fur, taking into account the direction of the pile.
3. Connect the shoulder seams and carefully iron them with the tip of the iron.

4. We cut the top with the lining facing inward, matching the shoulder seams.

5. Stitch and carve.

6. Turn it right side out, baste the bias tape, wrapping it around the cut of the neckline, and stitch it. We make pompoms at the ends of the ties. In my case, these are felt carrots.

Trying it on


We make the kids happy! Let's sew a bunny costume!
For those who know how to sew, it’s worth trying to make a costume for a 4-year-old child yourself.
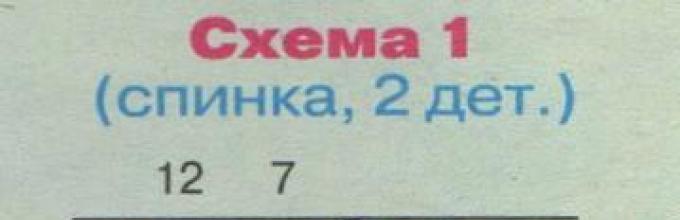
Pattern of a carnival bunny costume:
Materials required for this:
- 1.4x1.5 m gray plush;
- 0.8×0.16 m pink fleece;
- 0.27×0.12 m white plush;
- 0.1×0.06 m white faux fur (long pile);
- 0.8 m elastic band;
- 25 cm zipper.
Step-by-step instructions for sewing a bunny costume:
Step-by-step instructions for sewing a bunny costume:
From gray plush, cut out the front (2 pcs.), back (2 pcs.) and sleeves (2 pcs.).
Sew the back and front pieces, connecting them in the places indicated by the blue and green lines - you will get the left and right halves of the overalls.
Sew the center seams by sewing a zipper on the back.
Hem the trouser legs by 1 cm, leaving 2 cm at the end (for the drawstring).
Pull an elastic band 0.2 m long through the resulting gap and mend the hole.
Sew the sleeves, turn the bottom up 0.5 cm. Sew the sleeves into the armhole.
Cut out a shirtfront from white plush: cut out a rectangle measuring 0.22 x 0.12 m, and then round the short side. Sew the resulting piece onto the chest.
Use the remaining white plush for the tail. Fold a strip 5 cm wide in half with the fur inward.
Stitch along the long sides, turn the fur inside out, pull the open edge and sew the tail to the jumpsuit.
Cut out a hood from gray plush. Hem the edges of the piece by 1 cm, leaving a small gap for pulling the elastic through. Create a drawstring.
Open the ears: 2 pcs. made of gray plush and 2 pcs. from fleece.
Place the fur and fleece pieces right sides together. Sew them without sewing a 5 cm section. Turn the ear inside out through the resulting hole and sew up the hole.
Fold the ears lengthwise (pink side in) and sew them to the hood.
Use white long-pile fur and leftover fleece to create a bunny face on the hood.
Using this pattern as a basis, you can sew other characters, changing only the face, for example a cat:

Or a fox:


Pattern of a carnival costume for a bear cub:


Bear mask template:

Click “Like” and receive only the best posts on Facebook ↓

Master class
Three options for making a pillowcase without sewing

Needlework


