Initially origami used in religious ceremonies. For a long time, this type of art was available only to representatives of the upper classes, where mastery of paper folding techniques was a sign of good form. Only after the Second World War origami went beyond the East and came to America and Europe, where it immediately found its fans.
Classic origami made from a square sheet of paper.
There is a certain set of symbols necessary to sketch the folding diagram of even the most complex product. Most of the conventional signs were introduced into practice in the mid-20th century by the famous Japanese master Akira Yoshizawa.
Classic origami prescribes the use of one square, evenly colored sheet of paper without glue or scissors. Modern forms arts sometimes deviate from this canon. Varieties origami - And .
Today I want to share my impressions with you and tell you how you can make such a cute tulip from just two pieces of colored paper. As for me, a bouquet of such flowers on March 8 is capable of much more than its living counterpart :)
What you need for origami
- a square of red colored paper;
- a square of green colored paper;
- yours good mood and the creative mood of your little helper :)
Making origami
tulip bud
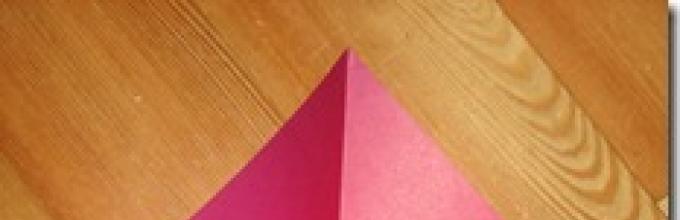
So, take a square of red paper (double-sided). Roll it into a triangle.
Bend the triangle
We bend the triangle on the other side so that our square is bent along two diagonals.
 Two triangles
  Rectangle
 Rotate the rectangle so that its fold is on top. Using the lines formed from previous actions, we fold the rectangle into a triangle.
 Triangle in the middle
 Here it is.
 Triangle front side
  Bend the corners
 We do this with all 4 corners, turning the triangle over to the other side. We get this square.
 Here's a new square
  Front side of the square
 We place the square in such a way that the edges of the sides with holes look down, and the edges are solid up. And these are the sides, whose bottom edge with the hole is turned to the center of the square in this way.
 We wrap the side
 We do this with 2 front and 2 rear sides. This is how we get a rhombus.
 Diamond
 Now, these two sides, in which there are pockets, are connected to each other. 2 on one side and 2 on the other. It was we who connected our tulip petals.
 On the other side
 We did it bud . At the bottom, two such pockets were formed, and between them there was a hole for attaching the stem.
 Bottom of bud
 That's it, now the most important part! Lightly blow into this hole and the bud will open!
Carefully straighten the petals and get something like this tulip bud.
 tulip bud
 Tulip stem
Take a square of colored green paper (double-sided). We wrap it towards the center of the side.
 We wrap the sides
 And on the other hand.
 We wrap the sides on the other side
 We get such a rhombus.
 Rhombus
  Connecting the corners
 We bend the resulting figure in half, bending it inward.
By March 8th we are making crafts together with children greeting cards , flower arrangements, bouquets. These origami: flowers and butterflies will just help you decorate a holiday card or create an interesting holiday composition.
Making snowdrops from paper
Take a green square measuring 10x10 cm and a square measuring 8x8 cm in white (pale pink, lilac, blue). Fold the white square in half like a book, lifting the bottom side over the top (1).
Fold the rectangle in half (2). Raise the bottom corners to the fold line (3).
Place the right corner on the left: the figure becomes three-dimensional (4 K). Glue the corners.
Turn over (5). Pull the first layer of the right corner: the fold lines are aligned (6 P).
The flower is ready (7). Fold the green square in half (8). Lower the upper sides of the square to the fold line (9 K).
Raise the bottom sides to the fold line (10 K). Fold in half, lowering the top corner onto the bottom (11).
Fold in half (12). Pull the corners away from each other (13 P).
Turn the part upside down (one corner is the stem, the other is the leaf) (14).
Glue the first piece, placing its corner inside the stem corner (15 K). Snowdrops: options with different angles of inclination of flowers (16).
Schemes for making snowdrops

.jpg)
Making a daffodil from paper
Take two or three bright yellow circles with a diameter of 5-6 cm and six yellow (white) squares measuring 5x5 cm and fold them into “candies”. Connect the “sweets” by gluing them in pairs: the vertices of the corners coincide (1).
Connect the three resulting parts: place one part horizontally, glue the others diagonally (the centers of all parts are aligned) (2).
Turn over the figurine (3). Glue a circle twisted onto the center of the flower. ballpoint pen: place the “bottom” of the handle in the center of the circle, wrap the outer parts of the circle around the handle, then, without removing the handle, apply glue to the center of the circle from the outside, place the part coated with glue in the center of the flower and press it firmly with the handle to the figure, holding it motionless, until it sticks. Repeat the action with the second circle: the part is placed inside the part from the first circle (4 P).
The flower can be glued to a stem made from a 15x15 cm square (see making a snowdrop) or twisted from a strip (5 V).
Schemes for making daffodils(to open the original, click on the picture)

.jpg)
Paper butterfly. Manufacturing
Prepare three 8x8 cm squares: two blue and one blue, one brown square measuring 6x6 cm.
First fold the squares larger size. Fold over one (blue) square, lowering right side to the left (1).
Lower the top corners to the fold line (2). Bend the bottom corners of the resulting house. Turn it over by turning the house upside down (3). Fold two more of the same (blue) parts (4). Cut one piece (blue) in half (5 B). Make a “candy” out of a brown square.
Fold the sides to the fold line (6). Fold the top corner and turn it over (7).
Connect the parts by first gluing the small wing on one side, then the large wing: the large wing slightly overlaps the small one (8 P). Glue the wings on the other side. Decorate with applique butterfly wings (9 K). By bending the figurine in half, you will teach the butterfly to “fly”.
Scheme for making a butterfly(to open the original, click on the picture)
On February 23rd we prepared origami cards for men, and on March 8th we simply had to do something similar for our mother and sister. Let's borrow the idea of Kitty Katkards, who suggested creating miniature women's dresses out of paper, and create origami postcard for March 8.
Manufacturing process:

1. Take a sheet of thin colored paper measuring approximately 10 by 10 cm, and the finished dress will be about 7.5 cm. Fold the square in half horizontally, then vertically.

2. Fold the sides of the square towards the center along the dotted lines.

3. Turn the folded paper over and fold the sides again with dotted lines towards the center.

4. Turn the paper over again, opening the upper “flaps” in different directions.

5. Stepping back from the edge about 1.2-1.5 cm along the dotted line, fold the top edge of the paper.

6. Start shaping the neckline as shown in the photo.

7. Fold both sides toward the center along the dotted lines.

8. Bend the lower corners of the dress in different directions along the dotted lines.

9. Fold the paper in half so that the corners marked with asterisks match.

10. Along the dotted line, bend back the upper part with the neckline, retreating from the fold line 1.2-1.5 cm, the size of the deviation is as you wish.

11. Start shaping the upper part of the waist, folding the corners along the dotted lines.

12. Shape the lower waist of the dress by folding the corresponding corners along the dotted lines.


The origami dress is ready! Now all that remains is to use it for its intended purpose.

Glue the origami dress onto a blank printed on a color printer.
Make inscriptions and decorate with rhinestones and other decorative elements, write a congratulation. You can decorate a gift box with this dress, if, of course, the gift is intended for your mother, sister, friend, or any other woman.


