Coloring pages for kindergarten
1. The little mouse loves to travel along the river. He sits in his boat and rows with oars.
2. Bunny walks in the garden and picks flowers. Beautiful butterflies with bright wings fly around.

3. A little hippo hurries to a tiger cub and a bunny. They will sculpt sand cakes.

4. The snail is slowly crawling somewhere along the path. She carries a basket full of mushrooms with her.

5. A good-natured elephant, along with his friend a kitten, performs every evening in the circus arena.

6. The bunny builds a house from multi-colored cubes. Now he will put up a pyramid - and the house is ready!

7. What does the hedgehog carry with it? He picked delicious apples in the garden and wants to take them to his pantry.

8. The little fox sat on a stump and played a cheerful melody. He made his own flute.

9. The bunny walks along the forest paths, collects delicious nuts and mushrooms. Do you like to walk?

10. A kind horse rides children in his cart. She will ride you too! It is very funny.
Drawing for children 4 years old is a favorite pastime where there is an opportunity to express themselves. Therefore, it is important to introduce kids to this fascinating business as often as possible.
What are the children drawing?
Most often, drawing for children 4 years old is connected with what surrounds them, what they are well aware of, familiar and interested in. In addition, the skills and capabilities of the children should be taken into account. After all, in case of failure, many kids deeply experience their imperfection, their inability to do something well. Therefore, drawing for children 4 years old is best to focus on what is around: nature, pets or favorite toys. There are many ways to depict the selected plot in the picture.
Pattern drawing for preschoolers
by the most in a simple way is the image of the selected objects using templates. In other words, this is practically coloring, only the contours of the object are not given to the child ready-made, as in the so-called coloring books, but are applied independently when used. turtles, human faces, etc.
Drawing a teddy bear using geometric shapes
The children receive their first drawing lessons. Children 4 years old can be invited to depict their favorite teddy bear using circles and ovals. Moreover, one should not focus on the fact that the drawing will be built using geometry. But while working, you can call the details by their scientific names.

- The head of a bear can be depicted using a circle.
- The second circle can be a little larger - this will be the torso. Both figures should touch at the point where the head meets the body.
- Two small circles located at the top of the head are the ears, they are also in contact with the circumference of the head.
- All four paws are better to draw oval. They are attached to the body, so they are drawn in such a way that the ovals are in contact with the lower circle.
- Now eyes and a nose are drawn on the muzzle, arcs are drawn from the nose - this is the mouth.
- Coloring the bear Brown color, leaving white an oval near the nose with a mouth, circles on the ears and a large oval on the tummy.
Game-lesson "Draw a picture!"
Interesting take on learning fine arts- redrawing done by an adult. For such an activity, you need to prepare pictures for drawing for children in advance by transferring the drawing through the glass. It is necessary to draw the outline of the object with lines, but not completely, making them discontinuous in some places.

The story of the turtle Francoise
You can make this activity more interesting and even fabulous by telling the kids an amazing story.
“The boy Fedya had a painted turtle named Françoise. They were very close friends, went for a walk in the park together, watched cartoons together, and swam in the river together in the summer. But once Fyodor forgot to put the painted turtle in the album at night. And the playful silly kitten played out, played pranks with an eraser and erased almost the entire image from the picture. The next morning the boy wept bitterly: only a pale outline remained of Francoise on the sheet, and even then in some places it was completely erased. Guys, let's help the boy and draw his dear turtle, paint it with paints and return Fedya's beloved friend!

It is important, along with the sketches, to give a sample picture for children to draw so that they can compare their drawings with the original.
Master class "Drawing a turtle"
It is appropriate after the fairy tale about Francoise and Fedya to invite the kids to portray a new girlfriend for the boy. Children of 4-5 years old perceive such drawing as fun and exciting game. Children will not be able to portray a turtle special work in the event that they are offered a master class. The drawing can also be built on geometric shapes.

- First, an oval is drawn.
- The lower part of the oval is cut off by a straight segment, the excess is erased with an eraser. This will be the body of a turtle in a shell.
- Just above the lower segment of the shell, you should draw the head of a turtle. Its shape can be round, oval or uneven, but from below it, like a shell, is limited to a straight line segment.
- Along the edges of the lower part of the shell, you need to depict the paws with short segments of straight lines, which are slightly wider at the bottom than at the top. They can be made not even, but with several fingers.
- Behind the reptile, you need to draw a short tail.
- Be sure to put eyes and mouth on the muzzle, otherwise Françoise will die of hunger and will not be able to see her best friend Fedya!
- The animal's shell has a pattern, so you need to ask the children to apply the ornament in the picture as well.
- Shades of green and brown are suitable for coloring.
From simple to complex

After mastering the simplest drawing skills, it is appropriate to move in this direction further. Take, for example, the object for the image is the cat Maruska, who lives in a neighboring yard and often basks in the sun next to the playground when the children go for a walk. The kids must have had a good look at it for a long time. And in order to have fewer problems with drawing, you can offer young artists a master class, where a detailed step-by-step instruction. Although joint drawing will bring great benefits. For children 4 years old, it is very important to observe from the outside how adults themselves do what they ask kids to do.
It is better to start drawing from childhood - this is one of the most fertile periods for mastering the basics of fine art.
Step by step drawing for children - a way that will help you develop the creative abilities of your child, regardless of his natural data.
You will spend many exciting hours learning the basics of drawing step by step and then be able to realize all your creative fantasies.
Staged drawing is a drawing method that allows you to create a drawing sequentially, in stages, from simple to complex.
Sometimes the whole thing stands still simply because the person doesn't know where to start. Often a child asks mom or dad “And draw a turtle”, and the parent would gladly fulfill the wish of the baby, but he doesn’t know how.
And if he had a step-by-step drawing of the same turtle in front of him, he would easily cope with this task.
For children, step-by-step drawing is a good help: firstly, they learn to draw without errors, following a certain procedure, and secondly, in the process of repeated training, they develop an algorithm that will later allow them to accurately depict many things without a diagram.
Finally, it's just very interesting and exciting to watch how a whole image emerges from small shapes and strokes, moreover, failures rarely happen.
How to teach a child to draw in stages?
Of course, at first it would be nice for the parents themselves to master this simple method. And if a child watches how mom or dad tries in creative work, the desire to repeat after the elders will definitely arise.
At first, in the lessons of phased drawing with a child, convenient and understandable schemes are needed.
The essence of the method is that drawing something takes place in several steps.
That is, when drawing a cat, we will not start with a tail or a muzzle, but we will follow a certain pattern that will allow us to avoid mistakes and inaccuracies in proportions.
The easiest way to start mastering step-by-step drawing is with pencil sketches. Paints and pastels will come in handy later.
Lessons of phased drawing at home
To organize the process you will need:
- sketchbook good quality(rather dense, paper that does not crumple in operation);
- pencils of different softness;
- eraser;
- diagrams that show everything clearly.
If pencil drawing has already been mastered, or if you want to immediately move on to pastels or paints, all this should also be available.
Give the budding artist a great workplace: comfortable table and chair, good lighting, no distractions. The child should be comfortable.
If there is a board or easel nearby - great, you can attach diagrams there. You can also use a book stand or wall.
Before you start drawing, be sure to tell your child about the following rules:
- you should not rush, everything works out only for those who try;
- you need to act strictly according to the scheme, especially if you are just starting to learn how to draw;
- remember what you are doing, and next time you may not need the scheme;
- start with the simplest, gradually moving to more complex drawings.
Next, we show the child interesting schemes. Offer a choice of several schemes, let the young artist choose what he likes. Remember that it is best to start with simpler schemes: first we master the phased drawing of animals, patterns, and later we move on to drawing a person.
Step by step drawing examples
How to draw a hare

Let's start with a stylized, cartoonish bunny, which is easy for a preschooler to get.
- We draw a large horizontal oval, and under it a small vertical one, but without a top.
- Draw paws to a small oval.
- A small oval and two circles in a large oval - draw a muzzle.
- We draw a nose and pupils - exactly according to the scheme.
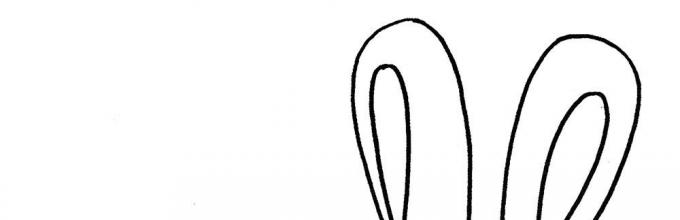
- We draw the same ears.
- We draw small details - a mouth, eyebrows, antennae, fingers. The bunny should have a flower in its paw.
- And now, under the paws of the bunny, it remains to draw a skateboard - our bunny is very athletic and mischievous.
Cat drawing

Now let's draw a cute cat.
- First, draw a circle - this will be the head.
- Two triangles on top - ears turned out.
- Inside each triangle is another small one.
- Two dots and a triangle nose - the muzzle begins to be drawn.
- From under the nose, two arches go in different directions - the cat's mouth. Do not forget about the luxurious mustache.
- We draw the torso - we start with an arc.
- We draw a collar for our cat.
- On the other hand, draw the paw.
- It remains to draw one more paw.
- And now you can take pencils or paints and make our cat colored. Ready!
Draw a dog

Now let's draw a charming puppy.
- We start with an oval and a semi-oval, they should not be connected!
- Now draw the eyes and tail.
- Ears, nose, spot around the eye - we continue to draw the muzzle.
- We draw a tongue and connect the head with the body and the ears with the head with thin rectangles.
- We draw paws.
- It remains only to decorate the puppy. That's all!
Draw a rose

- We draw a simple oval on a thin stem.
- We paint on the sides of the stem leaves.
- Draw two main petals inside the oval.
- Inside the petals is the base of the bud, like a rolled roll.
- We draw side, small petals.
- Add colors - and a charming rose is ready!
Drawing a cornflower

- We draw a circle on a thin stem.
- We draw the core and small stems on a large stem.
- We draw buds on the stems. Separate the petals.
- We finish drawing the buds, select the teeth of the petals.
- Erase the circle line with an eraser.
- We paint the cornflower in color.
Drawing a person

This simple circuit will help the child master the proportions in drawing a person.
- We draw the head (oval), neck and triangle - the future base of the body.
- At the bottom of the large triangle is a small triangle, legs (knees are drawn).
- We draw hands, leaning against the marks meaning length.
Tank drawing

Any boy will want to learn how to draw a tank, and it's not difficult at all.
- We draw the base, observing the proportions as much as possible.
- We draw the wheels-caterpillars and the muzzle.
- Let's focus on the small elements.
- With the help of pencils we draw a tank in color.
How to draw a pattern
Perhaps, after mastering the drawing of these elements, the child will be interested in painting on wood - a very interesting, traditional art.
Draw a pattern "Grass Ornament"

- A few curls - this will be the basis of the ornament. They should be even and graceful.
- In two large corners we draw red petals.
- It remains to draw smaller black petals.
Pattern "Leaves"

These elements are present in many samples of Khokhloma painting.
- A thin stem is a small, curved line.
- Draw an elongated oval on the stem in green.
- In the “pair” he has two more leaves, in which we draw the veins in yellow.
So, phased drawing is a method based on order and sketchiness. To fix a certain algorithm in the creative mind of a child, it makes sense to resort to this method. You should start with simple stylized drawings, images of cartoon characters, etc. It is both simple and interesting, and the result will be successful.
When a child has mastered the basics of step-by-step drawing, he may want to continue his creative studies in a fine art studio or art school. A. maybe he will continue to improve his skill in drawing according to the schemes, which will become more complicated.
We are happy with our new meeting, dear readers, and we hope that this joy is mutual. Today we will discuss how to correctly organize drawing for children 3-4 years old.
After reading the article, you will know:
- why drawing a three-year-old;
- what to expect from a three-year-old artist;
- how to organize a drawing lesson at home;
- how to draw with a child if you don't know how to draw.
Why is it important to draw with a three-year-old?
We are already talking about the advantages of drawing for a preschooler. At the age of three or four years, classes with gouache and watercolors, felt-tip pens and pencils, colored pens and crayons make a huge contribution to the formation of the child's personality:
- instill skills for independent work;
- develop emotional responsiveness;
- contribute to the development of perseverance;
- teach perseverance and accuracy;
- cultivate a sense of beauty;
- stimulate the imagination.
If drawing with your child is done by professionals from development centers or educators in kindergarten, at home you can draw by analogy or give the baby complete freedom of creativity. But if the baby is “home”, you need to be puzzled by this issue and organize classes in such a way that they harmoniously combine benefits, efficiency and pleasure.
Features of drawing in 3-4 years
By the age of three, the child already understands well what shape, size and color are. It matches images with real objects. Carefully examines landscapes. Drawing at this age, children try to recreate the images of familiar objects, embody their fantasies and real ideas about the world on paper. But, of course, it is not yet necessary to speak seriously about visual technique.
Toddlers are just learning the simplest tricks:
- hatching;
- painting;
- stamping;
- drawing with fingers and palms, etc.
By creating a conducive environment for drawing at home, you encourage your child to create the way he wants to, and when he wants to. This is very important for the formation of a persistent interest in the arts, the education of creative freedom. But it is also important to form and direct creative abilities, improving visual skills, aesthetic ideas, and the child's perception of shapes and colors.
It is important that at this age the interest in the process of drawing itself develops into an interest in the quality of the created drawing. Discuss your artist's creations. Let him tell what he depicted on the sheet and why he did it that way: what colors he chose, where he placed the drawn objects, etc.
How to organize a drawing lesson
Create a game situation
In a clear, simple and interesting way, set a task for the child.
For example, you can announce: today we will create a drawing on the theme "spring".
- Discuss what happens in spring with nature.
- Consider together reproductions of "spring" paintings by famous artists: Ivan Shishkin, Alexei Savrasov, Isaac Levitan, Pavel Bryullov and others.
- Suggest what can be drawn within the framework of the designated topic: flowers, lush grass, bright spring sun, an overflowing river, a tree covered with young greenery, birds flying from the warm edges.
You can turn the lesson into a game: say that spring cannot enter into its possessions, because it is lost. We need to help her find her way by decorating the path with beautiful pictures.
Fantasize, invent your own stories, use your favorite characters of your heir or heiress.
Let your child create their own drawing.
Try to pronounce the task in such a way at the first stage so that the child does the direct drawing on his own.
- Discuss in advance step by step what the baby will draw.
- Show him on a separate sheet how to depict the subject.
- Offer a sample created on the spot or in advance.
But give your child the opportunity to work independently. Don't customize it. Don't draw for him. And, most importantly, do not criticize his efforts.
Help improve the image
 When the drawing is ready, pay the attention of the young creator to how you can refine the individual details of his creation. What colors would be appropriate in this case. How to correct the shape of a drawn object. Refine the drawing yourself or ask the author to do it.
Analyze results
Children's drawings created at such a tender age are beautiful without exception. Feel free to praise your artist.
He is really good:
- studied;
- tried;
- created,
- listened to you attentively;
- managed as yet naughty fingers.
It is important that in the end he receives approval and recognition. But at the same time, do not forget to gently and carefully discuss how to draw even better next time, even more interesting, even more beautiful.
Stamp everything
At 3-4 years old, almost all kids are delighted by drawing with stamps. Although stamping is usually regarded as unconventional technique drawing, recently it has become so widespread that it is not inferior in popularity to the more familiar methods of applying an image to a canvas.
The advantages of drawing with stamps are obvious:
- Allows you to create interesting drawings without artistic skills.
- Helps to learn colors.
- Stimulates the desire to draw.
- Develops fine motor skills.
- Trains out-of-the-box thinking.
When stamping, they draw with fingers and palms, cotton buds and foam rubber, potatoes and cauliflower ... There are practically no limits for imagination. Moreover, the production of stamps, which, of course, falls on the parents' shoulders, perfectly develops the creative abilities of adults. You will be surprised how interesting it turns out to be to cut stars and hearts out of carrots for your beloved child, or to come up with something else to adapt to this incredibly addictive activity. You will draw with your beloved baby, even if you previously thought that you could not draw.
Any wishes, comments or questions? Write to us - we always welcome feedback from our readers.
Happy parenting, dear friends!
Coloring games are loved by all young children as it is incredibly useful, it develops children's imagination, memory. The ability to think creatively is also essential here. But with creativity, children usually have no problems, but exactly the opposite. It is better to do more coloring, no matter if the child has already grown up. The more coloring, the better. Even as an adult, such ways of throwing out a positive, and somewhere childish, imagination are more useful than anything to a person.
On this moment popular coloring pages on the internet. It is very simple and convenient, because we all now have computers and the Internet. Free Coloring Pages for Kids presents you with a choice of a large number of different coloring pages for every taste. Both girls and boys can play games "Children's Coloring Pages 3-4-5-6-7 years old", everyone can show themselves and show their creativity in all its glory.
You can choose any drawings, and by complexity, by beauty, by topic. The child will get down to business and turn an almost empty sheet, a nondescript outline of a drawing into a colorful and beautiful picture. If you like your work very much, you can save it and let it be in your memory for many, many years. Suddenly you become a talented professional artist, and you can always open and see where you started your journey.
Free online coloring for children 3-4-5-6-7-8-9 years old will give your guys a lot of fun, because. We offer drawings on various topics, for different ages: and very simple objects, and animals, and fairies, and fabulous and cartoon characters. We are sure that the coloring of the pictures offered on our website will allow your child to spend time with benefit and joy. The drawing can be chosen according to your taste, any. In addition, after all, a successful drawing you like can be saved to the computer’s memory, where a huge number of such electronic drawings will fit, and after a while, when your child gets older, you will open the file and see the very first coloring.
- such a familiar and beloved word from childhood. It is from children's coloring books that the world takes on color for a child. “Orange sea, orange songs…,” is a popular children's song. All children are talented, it is only necessary for parents to develop them correctly. Children are inquisitive, they catch everything on the fly, absorbing knowledge like a sponge. Even before school, literally from 2-3 years old, you can offer your child something educational, for example, various cubes, designers, colored paper, shreds, plasticine, colored pencils. Drawing is perhaps the most important skill for a child to learn about the world around him, when he literally creates his own scenario of the world, his art. A drawing kid fantasizes, maintaining, according to psychologists, mental health. Drawing improves concentration. It is very important that the child communicates enough with the parents. What saturates with such attention? Reading books by parents, joint needlework and DRAWING. While the baby is small, this is coloring. To maintain interest, so that the process is a joy to the baby, you need to start with the simplest plots, choose bright, positive colors. The image introduces the child to the shape of objects and their sizes, introduces the palette of colors. And gradually the child learns that a crocodile cannot be orange, and the sun cannot be green. A brush or pencil in the baby's hand develops fine motor skills, teaches to be careful. When coloring, you can tell stories related to what the child draws: this is how the child will recognize the real world. Coloring pages for girls make the child an optimist, promotes quick memorization of objects through their visualization. A child who draws plays, coloring allows you to relax, gives peace of mind, which is also useful for adults, so coloring together has a double benefit. Today, in addition to the usual "paper" coloring pages, online coloring pages are appearing. The advantage of such coloring pages is their mobility, variability, reusability, and sometimes even animation. Such black and white pictures are loved by all children. Drawing online, the kid experiences the joy of the birth of his favorite story, when the picture seems to come to life. For example, girls are very fond of "dressing" princesses or fairies. Only instead of a pencil - a mouse, and you can easily draw clothes, jewelry, interior items, cars. I didn’t like it - I removed it, painted it again, picked up suitable color combinations (the computer program allows this).