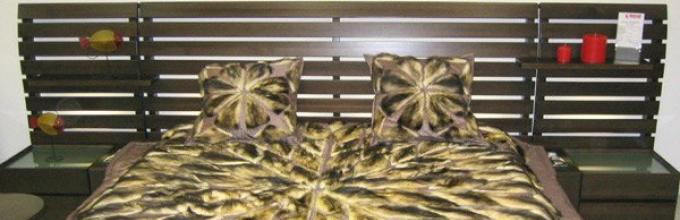
From an old fur coat, you can make such wonderful blankets that will help create coziness in the house, a warm home environment. What could be more expensive after a hard day's work?
Probably every woman has some kind of fur things: a fur coat, a hat, collars that have served their time. for a long time in favor of us. You can make a blanket on a sofa, a cape on an armchair or a small rug for the feet in front of the bed. 
Not a single piece of furniture can resist such a soft and fluffy decoration that will make any room not just a place of relaxation, but also a romantic, sophisticated place where you want to spend time and relax your body and soul.

And fur rugs on the floor will truly be a fairy tale for your tired legs during the day. 

So where to start? If the fur is very worn out, then a big thing will not work out of it, the main thing is that the mezdra is intact. We open the fur coat, free it from the lining, we take only fur into work. Long, matted fur can be combed with a comb with sparse teeth. Fur, if there are grease stains on it, can be cleaned with a brush dipped in gasoline, to which a solution is added washing powder, (1 teaspoon per liter of water). The stain is wiped again with clean gasoline, of course, this treatment is best done on fresh air observing fire safety measures. 
Very dirty light fur is rubbed with gruel made from gasoline and starch or bran. The fur is wiped with this gruel, then allowed to dry and shaken. Fur can even be vacuumed. You need to wipe the pile of the skin in one direction: not very greasy places along the pile, heavily greasy, for example, from the cap, against the pile. Sweat stains are removed with the following mixture: 3 teaspoons of salt are diluted in 500 milligrams of water and 1 teaspoon is added ammonia. After that, wipe with clean gasoline. 
A fox collar or hat can be cleaned without gasoline. Sprinkle the fur with starch, sprinkle with water, let dry and shake well. The fur will change. Dark smooth fur is cleaned with dry hot sand. Try to tint a yellowed light astrakhan with blue or blue fabric paint. With a swab or cloth, treat the top layer of the fur without wetting the core. 
Wet fur is dried away from batteries and sunlight. Our coat is dry. We take a furrier's knife or a scalpel and carefully, using a metal ruler, cut off all the worn edges on the reverse side. Cut only the core, without touching the fur. We got pieces that now need to be attached correctly to each other and sewn together. For dense fur, a faceted needle is suitable, but you can use a regular one. You will need threads in tone No. 10 and a thimble. For strength, the threads can be rubbed with wax. 
Lay the prepared parts of the fur coat face down on the table and mark the lines of the joints with a small line every 5 centimeters. In these places, it is better to fasten the details with a few stitches. Now start sewing with an overcast seam over the edge, trying to lay the seam evenly, after 2-4 mm. After you have sewn the parts, iron the seam with the rings of the scissors and tap the seam with a wooden mallet. You can finally align the seam by moistening it with water from the side of the mezra and drying it in a straightened state. 
You can try to sew fur with a dense mezra on a sewing machine. Fold the pieces face in, fasten every 5 cm by hand and zigzag stitch so that the top weave of the seam runs near the edge of the leather. 
Fragile skin, torn under the needle when stitching, needs to be strengthened. Place a piece of cotton fabric under the weak spot, gluing it with glue, which, when dried, will remain elastic, such as rubber. Gluing with glues "Moment", "Uni-kum" or "88 N" will turn out harder. The glued fur is sewn together with the fabric. 
For lining, apply a suitable fabric from the inside and quilt frequently, grabbing the entire thickness of the leather with the needle.
Your old fur coat will still serve you!
Do you want to please your child with a warm rug in the form of a cat? We will show you how to sew a rug with your own hands. In modern homes, you can rarely see large rugs or carpets on the floor, the housewives know how much dust accumulates in them. Therefore, a small rug for the floor is a must-have in the house. It is not difficult to sew such a rug in the form of a cat. It will allow you to create a cozy atmosphere in your home, it is convenient for your baby to play on such a rug.

For work you will need:
- Fur artificial 0,6 m with a long pile brown.
- Fur artificial 0,6 m with a long pile white.
- Pink piece of fabric for the nose.
- Lining fabric (any, preferably cotton).
- Threads.
- Black threads for embroidery of the muzzle.
- Sintepon.
- Adhesive material flesofix double-sided (you can just baste the details)
We start by drawing a pattern on paper, cut out and cut out the upper part from white fur. We take fur Brown, from it we will cut out 17 triangles and the bottom lining. For the lining, take a cotton fabric and cut out two parts from it.

We attach triangles to the upper part according to the figure. Then we make a spout, cut it out of pink fabric and fasten it with an iron and flesofix. It needs to be fixed additionally by processing the edges with a zigzag seam. After that, you can proceed to the design of the muzzle: with black embroidery threads we make mustaches, eyes and mugs on the muzzle. Now that the top (front) part is ready and embroidered, we can sew it along with the lining, while leaving allowances for the seams, as well as some space for stuffing.
Now you need to turn the rug on the front side, straightening all the seams, and fill it tightly with filler, and sew the open area with a blind seam by hand. The finished rug will measure 80 * 63 cm. Adults, children, and those who are cat lovers will appreciate such a gift or home decor.
lion cub


It is not difficult to sew a wonderful, warm and original carpet for a children's room. We will please your baby with a rug in the form of an African lion. You can sew from an old faux fur coat or cut faux fur(sold in the store). Just a little time and effort, in the end you can get the right rug.
For work you will need:
- 1.4 m fluffy soft tissue for the main part.
- Brown fabric or leather for details.
- Threads for embroidery muzzle.
- Scissors.
- Sewing machine (you can use small stitches on your hands).
- Sintepon for stuffing.
- Brown fringe or thick yarn.
- Dark lining fabric.
- Beige yarn for spots on the body

We draw the body of the Lion Cub on the main part with a felt-tip pen. We cut the main and lining.

We sew the body of the lion, leaving room to turn inside out. The lining should be thick.

We take a large plate, put it on the main fabric and circle it with a felt-tip pen - this will be the head of the Lion Cub. There are two round pieces. We draw a muzzle and ears on paper, transfer to the fabric. Cut out the details. Ears - 4 pieces, muzzle - 1 piece of white fabric.

We grind the details of the ears. Carefully draw the muzzle of a lion cub.

We designed, embroidered the muzzle, sew the head with the back of the head, leave a place for stuffing. When you grind the details of the head, put fringe or yarn in the seam instead of fringe and stitch.

Quote from Marriette Fur knitting. How to make fur yarn.
This morning I was looking for a very necessary and relevant topic for myself - how to make fur yarn. You can create masterpieces from fur yarn, if you know how to knit, of course) Below you will find ideas for inspiration, recommendations for cutting yarn, the secrets of working with fur and methods of knitting with fur. When using old fur, it is advisable to strengthen it with diblirin. Pieces of fur made using the freeform technique are especially good. That's where the revelry for fantasy!


Cutting preparation.
In order to make it more convenient to cut, the skin is corrected, that is, sprayed with water from a spray bottle and stretched. But it is better to rule not with water, but with a special solution - grease, this will give elasticity to the skin and shine to the pile. There is such an American drug Elbomor, it is diluted as follows:
If the skin is rattling - 1: 3 (elbomor and water),
If the dressing is normal and the skin is natural, then 1: 5.
The dyed skin does not stretch well, so we also use 1: 3.
There is also a German drug furalastik.
So, they wetted it with a pulverizer, but lightly so that the skin was not wet. They rolled the skin into a roll, put it in a plastic bag and let it lie for about 30 minutes, or maybe a little more - for a colored skin. Next, we correct with carnation pegs or a stapler. We rule on a plank shield, you can take chipboard or some other similar material. After we fixed it at the muzzle and rump with staples or pegs, we correct the ridge, punching it. It is better to guide the ridge near the skin with a special wheel before straightening, then everything is visible from the side of the skin, and then it is convenient to work when cutting the strips. Next, after the ridge, we fix the rump part, evenly stretching the sides, so that the symmetry is preserved, then we break through the cross, this is the most poorly stretched place near the skin. And then we rule in the same way from the rump to the sides. After that, the backbone was removed, since the skin is already stuffed and we do not need the broken line of the backbone. We are waiting for it to dry. It's 8-10 hours.
Now you can draw stripes on the skin with a special gel rod or a simple pencil.
If the skin is old, then before cutting it can be lubricated with the following composition: beaten egg white from one egg, mixed with 1 tbsp. a spoonful of glycerin.
If a good soft skin, you can not edit at all. Just fasten the skin and cut. If the stripes are wide, it is better, nevertheless, to draw lines. And if you cut in strips of 3 mm, then you can cut without lines, it's more convenient. It is better to cut with a clerical knife, the tip of the blade.
How to cut
To make the fur ribbons longer, they are cut in a zigzag or in a spiral, according to this pattern due to different directions hair knitting is more fluffy. But other options for cutting strips are also possible. After all, we do not always need a long strip, in some cases it is more convenient to connect fur ribbons already in the process of knitting with fur, because it is inconvenient to work with long ribbons, for example, when pulling ribbons or braiding them.
What does it mean to cut in a zigzag? Cut across the skin, without cutting to the edge through one line by 0.5 cm. Whether it is convenient or not to knit with a ribbon cut in this way is a moot point. I think this option is suitable if you make a fur thread, that is, then twist this tape. And if you stretch the fur tape through the cells, then it is better to cut even strips.
There is such information that it is convenient to cut the whole skin with a “stocking” in a spiral, because then you get a long thread - the very thing for knitting with fur and the pile will be all in one direction. But in reality, it turns out that cutting this “stocking” is not at all convenient, so I would not recommend this option to you. However, see for yourself.
The fur thread is cut with a clerical knife or a blade by hand and you need to change the blades often, because they quickly become dull. A knife, in my opinion, is much more convenient and safer.
There is such information that, ideally, the skins are cut along the ridge, then they take strips from the ridge from all the skins, then the backs from all the skins, then the bellies from all the skins for work - knitting is then smooth-smooth according to the difference in the size of the fur. I would like to make some adjustments myself. When you knit with fur on a large scale, perhaps this will suit you. But when you first start learning how to knit with fur, it is unlikely that you will buy many skins at once, and even of the same type! one color. And therefore, most likely, you will have only one skin. So, in order to get fur ribbons from one skin with uniform, fluffy fur, you need to cut not along, but across the skin.
If we have a whole skin, it is better to cut across the skin, and if the pieces of fur, then the choice is small, you have to cut how it turns out so that the stripes are longer.
But if you work with scraps, then you just need to sort at least by eye according to the length of the pile.
Twisting a fur thread
If we plan to knit with fur, namely, with fur thread, then our chopped fur ribbon still needs to be prepared, that is, twisted.
If we cut in a spiral or zigzag, then our ribbons are long. And if they were cut in short strips, now we are faced with the problem of how to connect the strips before twisting. We connect simply. There are two ways: sew or glue.
It is advisable to moisten the chopped fur before twisting, that is, not the fur itself, but the skin.
Moisten with this composition: 3-4 tbsp. tablespoons of water + 1 tablespoon of vinegar 9%. What will it give? The fur thread will become smoother, stretch a little, and thanks to vinegar, they will not unwind. And in the sock, the product will then be better tolerated by adverse weather conditions. You can dry it by wrapping stools around the legs. After drying, roll into balls.
How to twist? You can use a drill, or you can take a warp thread and wrap a fur strip around it. A special tool is also used for this purpose, it is used for knitting flies for fishing.
Regarding the options for connecting pieces of fur ribbons, on the subject of which option is better, opinions are divided. It’s better for one to sew, they say that gluing is a laborious task, but it’s of little use - everything will fall apart, but in general a thread and a needle save better and more reliably in further work. Others like to stick together more, and stitched, they say, often unravel. So here you need to choose what you like best. But if you glue, then you need to choose a good glue. They say that German furakol, special for fur, is a good glue. But you can also glue with ordinary leather glue or even super glue. You just need to prepare the ends of the fur ribbon. We leave one end as it is, and at the other end we cut off the fur a little. To glue, as well as to sew, we will overlap. To do this, cut the fur. They cut off the fur, smeared it with glue, quickly applied another tape, and glued it. The place of gluing should be small so that it is invisible, and the glue should be strong so that it does not come off. If we sew, then the stitching place also needs to be prepared by cutting off the fur on one side, and this place should also be small, and the threads should be strong.
Some people like knitted mink.
For example, you have mink trimmings, cut them into very narrow ribbons. Glue several ribbons together with leather glue. Then you twist them with a special tool, it is used to knit flies for fishing, but you can think of something else. Then roll into balls. It turns out mink yarn, of course, not always uniform in thickness, but in knitting it looks very even nothing. Knit with knitting needles with the addition of woolen thread. This is a long business, winding threads from mink, but worth it.
But in general, fur ribbons can be cut from any scraps of fur, not only mink. Fur trimmings can be bought by weight much cheaper than a whole skin.
Knitting with fur using the "knitting" method
If we have chosen such an option for knitting with fur, in which the fur is knitted, we do this. We knit a crochet product. To begin with, it is desirable to knit a sample for a couple of rows, then we take a strip of fur and knit it with an overlay, that is, the strip should be located, as it were, from the face of the product, and we tie it in the wrong row.
Knitting options.
1) You can knit fur in each row. At the same time, the yarn is practically invisible, the product looks completely fur.
A) We start knitting, as usual, with a series of air loops (or rings).
And repeat the next rows in the same way.
B) Again we start with air loops.
We repeat the second row.
B) Again air loops. Two lifting loops, a double crochet, again clasping the fur ribbon in front with a hook. And so we knit to the end of the row. The next rows are exactly the same.
This knit is very tightly wrapped around the fur.
D) Well, you understand that again there are air loops. Again, two lifting loops, a column with two crochets, crocheted around the fur ribbon in front, 1 air loop. Repeat until the end of the row. And so do the next rows. This knitting with fur turns out to be looser, more airy.
So, you noticed that the number and type of columns can be different, it all depends on the thickness of the yarn and on the condition of the core (soft or not). The worse the mezdra, the tighter we tie the strip of fur.
2) You can knit fur not in every row, but through a row.
In this case, the yarn will definitely be visible. The product will be more elastic. This option, it seems to me, is more suitable for hats. The product turns out to be fur and very plastic and elastic.
You can knit, for example, like this:
1 row air loops,
2 row is just a half-column with a crochet,
3 row half-column with a crochet, with knitting a strip of fur.
Knitting with fur by the "braiding" method

Weaving the base mesh with fur thread.
In order to braid the mesh with fur thread, we do this. First we need a grid. It can be crocheted and different shapes, for example, takes either a hat or a headband if you want fur knitted hat or takes and so on. You can also buy netting, but this is a bit problematic, because tapestry netting is not suitable, as it is rigid and its cells are not fixed. So it’s better to knit it yourself, with a crochet, with double crochets, while immediately of the desired shape, most importantly, make the cells at least 5-7 mm. Patterns will not be needed to cut a canvas from a purchased mesh. Further, the columns of cells are braided with fur thread using a pin or tapestry needle. The number of skipped cells depends on the type of fur - the longer the pile, the less “airy” weaving. We braid, make sure that the fur is on top, correct where necessary. After completing the work, let's go through the comb - both from the face and from the inside. After all, we get a two-sided thing. By the way, you can even take your own ready-made and, perhaps, even worn thing, knitted with a large viscous, and braid this thing with fur thread. You can braid completely, but you can only braid the edges, or somewhere in the middle. In general, turn on the fantasy - and go!
Good to know!
When weaving along the grid, leave 2 cm free around the perimeter of the cut part (in addition to the stitching allowances). You braid the whole part, then sew it, and braid these 2 cm - then there will be no sharp seam-joint (this is very important in the armhole, otherwise it can puff up, etc.) The bottom can be immediately tucked up and braided to the bottom.
At first, we don’t fix the beginning of the fur thread in any way - then we attach the thread to it in order to braid the “seams”, at the end also - let the seam into the braid, then at the very end we sew the ends to the mesh.
We unfold the fur thread at the end of the row - we pull it out to the wrong side and transfer it to the next column. If braided vertically, “pigtails” on one side and “small stripes” on the second are obtained with short fur. Both that and that side can be done with the front, - whoever likes what, but “accepted” with pigtails.
In knitting with fur, the straighter the model, the better; it is better to cut out the shelves and the back at once with a whole canvas without side seams. And braid entirely, first bending the bottom and the straps, where there will be hooks, buttons, buttons.
Braiding the base mesh with a fur ribbon.
If the fur is cut along the skin and the pile height is different on different strips, you can knit with fur either mixed or alternately. For example, we knit a scarf with fur. To begin with, we will knit the base mesh with woolen or cotton threads. Now let's start braiding with fur. First, we braid the middle of the scarf with the bellies with the shortest pile and weave in one direction, and then in the other with these bellies. Then we put stripes from the sides into action, again, in both directions. Then backs, and in the end, stripes from the ridge - it turns out smooth transition pile height. And on the tips, if we have tails, you can make brushes from the tails, it will be very beautiful.
Can be weaved English gum, then the fur will be only on the front side practically, on the wrong side only a little bit. But then the product turns out to be more voluminous, dense. If it is a hat, then it must be tied tightly around the head, because when braided with fur, it will stretch.
Tricks in working with fur
RENEWAL OF THE HAIR AND SOFTENING OF THE MEZDRA
To begin with, I advise you to use a freezer that supports -24 degrees. The old skin should be placed in such a chamber turned inside out, and placed in a canvas bag or in a cotton pillowcase. The skin should lie there for a week, The flesh will thicken from the frost. When I did this for the first time, then, pulling out the package from their refrigerator, I immediately began to pull it out and unfold it. It's good that I noticed in time that it was just splitting along the folds. I left it to thaw so that the mezdra would come into equilibrium with the microclimate in your apartment. Half a day is enough. This is the first step. Also, when moths appear, place the fur in the freezer for a couple of days.
Second. If there is a fur industry in the city, there is always (usually in canisters) all kinds of chemical impregnation for leather and menzra. For a small fee, they will always cast you and tell you how to use it. If this option is excluded - to the pharmacy for glycerin. 1-1.5 tablespoons per 1 glass of water. Soak the menzdra and fold it to each other for a couple of three days, set aside the skin. One of the girls has already described this method. (use this option carefully, because - "When I flogged the lining, it turned out that the mezdra was barely alive and in some places just fell off the seams, and hairline very heavily loaded with glycerin.)
And then - simply. To avoid leakage of the skin from the seams. After cutting the fur, from poor quality chintz (cheap and rare material, be sure to wash it before use to shrink) we cut the same parts, only with allowances for seams. We sew the chintz to the fur with large oblique stitches. We connect the parts immediately through 4 layers - fur + chintz and chintz + fur.
Why should the chintz be of poor quality? It is loose, i.e. full of holes. Therefore, the menzdra will breathe freely. But then we just begin to treat such fur as normal, but still a little more sparing. Gently moisten (along with calico beauty) the menzdra, I usually use a spray bottle instead of a wet sponge, and stretch (without fanaticism, sparingly) on the sew. After drying, we comb the pile and understand ... the fur is still good, it will still serve
Comb and let lie down to breathe, then you can walk with a cloth moistened with a solution of vinegar (1 teaspoon per glass of water) - just smooth it, do not wet it much - the outer pile so that it straightens and shines
Smooth out the skin. if it is scrunched up or dry, wet it with the composition = 1 teaspoon of glycerin per glass of water (sold in a pharmacy)
If it is very skukorzheno-rigidly, then more glycerin is possible
Treated with a solution of glycerin - smooth and fold 2 times with the fur out - put in a cielofane bag to soak for a day or two. then take it out and straighten it
1. Dyed with Prestige hair dye, eggplant color. I painted everything according to the paint instructions. I smeared it, waited half an hour, washed it off, smeared it with hair balm, washed it off. skins nailed with a stapler on plywood, waited until dry. Brushed with a cat brush. Painted evenly, shines, the appearance is satisfactory. I smeared it with glycerin, it became softer. only the light core did not suit. I painted it black with gel paste. The core of the gel paste was blown into about 20 grams of vodka and stirred. You have to paint twice. All dried up, and cut into strips with a razor.
STRIP CUTTING
Grid 9 * 9 mm squares - the fox weaves normally, it turns out not loose and not tight.
1. Strips about 3mm thick. Cut in an endless zigzag in the direction of hair growth. It is convenient to cut without reaching 3 mm to the end of the skin and then cut to the end. From the half of the collar, about 15 by 20 cm, 6 m of fur thread were obtained. I just folded the thread of the connection with woolen and began to knit.
2. if you cut the fur horizontally (and not along the ridge), the mezra will be visible .. I tried to first cut across the direction of fur growth, also thinking of hiding it White color cutting the skin ... but this increases the consumption of fur, because. you need to wind the strips of fur more tightly in order to rip off this very core with an overlap of pile. With transverse cutting on one side (where the direction of growth of the fur comes from), it is too clearly visible. By trial method, I nevertheless came to the conclusion that it is necessary to cut the strips of fur along (IMHO), while winding the fur rises and turns out to be more fluffy and this hides the cuts. Well, with not very stuffed fur, sometimes a cut is still visible in some places, then it needs to be painted over to match the fur.
3. In general, fur is cut on weight. I put the skin on my knee, lift the upper part with my left hand and push the cut strip away with it, and take a knife in my right and cut along the edge, while holding the skin with my right hand so that it does not slip. You have to get used to it and everything will work out. The fur should not fall off, naturally there will be small remnants when cutting the mezdra, and so it remains all.
4. it is more convenient to cut a whole skin with a “stocking” in a spiral, because it will turn out to be a long thread - the very thing for knitting and the pile will be all in one direction - and this is the guarantee that the fur will not stick out in all directions, and even when we cut pieces "like if you have to" then the result is not "fur sticking out in all directions" but "fur coats" and you will twist it later, right? - the fur will "lie" in one direction along the thread when twisting (this is convenient during the knitting process itself) when weaving, a long thread even interferes, imagine - stretching the entire skein through the cell
5. The width of the strip depends on the thickness of the fur. I cut the tails of the fox into 1-2 mm. And one more thing: such fur as a dog, a fox, etc., I would only tie

6. I measured a hat made of silver fox (such a short hair), strips of fur 5-6 cm wide were sewn onto a knitted hat, so it looked like it was made from a single skin
1. yes 1 * 1 English elastic. But I immediately warn you, knit a size smaller and knit tight, otherwise it will stretch and be big .. And knit immediately a completely finished thing. If you don’t have experience, start braiding somewhere under your arm or from the back, and don’t forget to follow the direction of the pile. Do not sew very long strips, it will be inconvenient to braid, it is better to splice as you work.
How to sew a strip of fur? and how do you wash it?
Take a fabric tape (as wide as it will be convenient for you, well, like this ... they let you in at the bottom of the trousers, etc.). the ribbon in general can be at least lace! depends on what kind of vest (maybe in 1 thread of mohair - then something "easier" is needed, for example, a lace ribbon)
Put fur on it so that the fur goes 1-2 mm onto the ribbon
Stitch (you can use a small zigzag)
1. leave it like that - if the fur is "decent" and the wrong side of it, or if a thin strip of fur is needed "airy"
2. the fur is folded in half and the unstitched edge is manually attached to the tape (a thicker edge is obtained so that the fur is on 2 sides)
The edging is ready;


It is easy to sew a fur vest with your own hands. Choose a model and make a pattern.
Fur vests are relevant in winter and in the off-season. If earlier they were worn over a coat or jacket only by traders in the markets, now every fashionista has such a thing in her wardrobe.
- Fur vest goes well with jeans, classic trousers and a skirt. In such clothes it is convenient and not cold to ski and skate, or to run in the morning through the stadium or park.
- Almost every auto lady in her car rides in a fur vest, as it is warm and comfortable in it.
- Sewing a vest with your own hands is easy. There are several ways that will be discussed in this article.
You can come up with your own model of a fur vest, or choose from what we offer. In any case, it will turn out beautifully, stylishly and you will be warm in these clothes, even if the vest is made of faux fur.
Important: When cutting fur, use stationery knife. Make smooth and short movements, as if “pushing apart” parts of the fur parts.
Remember: Do not cut fur with scissors! The villi will be damaged and will begin to get enough sleep.
Advice: Sew parts on a special machine or manually. Place paper under the presser foot. Lined fur is sewn with villi inside.
Do-it-yourself models of fur vests - photo:
A simple fur vest made from an old fur coat. The belt can be bought new or used from any trousers or jeans that are in the wardrobe.
The combination of knitted fabric and fur in contrasting colors is beautiful and unusual.

cut off the old leather jacket sleeves, and sew fur. It will turn out such a stylish vest - simple and original.


Mouton fur vest. Easy to cut, fast sew.


Fur vest with leather placket with zipper. Attractive and interesting.


The first model is a vest with sleeves and the second is a shortened model, made of natural fur. Below in the article you will find patterns on how to sew a vest with a ladder, and how to cut a short fur top.


Children's fur vest from an old fox fur coat. Free cut allows you to make the product for growth - convenient and practical.

Men's fur vest with leather placket. The collar is cut out separately, and then sewn to the vest.

From any fur you can sew a vest. All you need is a pattern and 1-2 hours of free time.


Sewing a vest is easy. The pattern consists of a back and two shelves. The final result will depend on what kind of fur you used - a whole canvas or pieces, fluffy or smoothed, artificial or natural. Either way, it will be attractive.
Every woman takes care of her fur coat and wears it for a long time. But the fur wears out quickly, especially on the sleeves and hem, and the style becomes obsolete. Such a worn thing can be given a second life - to sew a fashionable and stylish fur vest. First you need to rip all the seams, and divide the fur coat into parts.
Now it’s worth considering in detail how to sew a vest with your own hands from an old fur coat. Below will be presented models, as well as women's, men's and children's patterns.
If you have two old fur coats, for example, children's, you can combine fur and make a vest from fur of different colors. You can combine faux and natural fur, but the base should be smooth, and the decor should be fluffy.

Here is a pattern of such a women's fur vest. Here the model is fitted, but you can make a straight cut. To do this, you need to draw a straight line from the bottom of the armhole to the bottom of the product itself. In this pattern, in order to make a fitted cut, there is an indent from a straight line by 3 cm exactly in the middle. Then three points are connected to make a waist on the product.

Men's handmade fur vest. The male model, unlike the female one, is made without a waist with wider shoulders. The collar may not be sewn on. Instead of a zipper, regular buttons will do.


Pattern of a men's fur vest. The length depends on personal preference. On the pattern, it is small, you can make a long vest.

Pattern of a regular collar and a stand-up collar. If you want to make a wide collar, then increase the dimensions on the pattern.


White faux fur vest. This type of fur is easy to cut and sew, like a regular dense fabric.


It is possible to sew such a model. On the right are two products with collars from the store, and on the left, a mother made this vest for her daughter with her own hands, but without a collar.


The pattern of such a vest for a child consists of two shelves and two parts of the back, which are then connected.


Create for yourself or your household such products so that they are warm both indoors and outdoors.
Almost every woman or man also has a sheepskin coat. If the thing is already worn out, make it a warm and cozy vest. In such a product, you can combine the front side - smooth, and the wrong side - fur. Get interesting and stylish.
How to sew a vest with your own hands from old sheepskin coat? Below are simple but beautiful models, women's, men's and children's, as well as patterns.
This pattern of a children's vest from a sheepskin coat can be made for a child of any age. Take measurements from the baby and transfer them to the pattern.


If the sheepskin coat was buttoned, carefully cut off the placket and buttons. The model should be a little loose.


This is how vests made from old sheepskin coats look like. Instead of buttons, you can sew on a tie or a special hook.


Below are different patterns for women's sheepskin coat vests. It is worth noting that a sheepskin coat product can be sewn according to a fur product pattern.


A hipster style of clothing or street fashion will suit such a simple vest model. But you can also wear a regular, not too long sweater.

A pattern for sewing such a product can be taken from any of the above or this one.

Many women do not want to bother and make a pattern for sewing a vest. If you plan to wear such a thing at home or put it on when you go out to, for example, take out the trash, then you can sew a simple product quickly and without a pattern. Cut the seams of an old fur coat or sheepskin coat and take it apart. So, how to sew an elongated fur vest without a pattern quickly?


Follow these steps:
- Find any thing in your wardrobe: jacket, cardigan.
- Turn the product inside out.
- Attach the back to the fur first and cut it out. Then do the same with the right and left shelves.
- Sew the seams of the resulting blanks - the vest is ready.
You can sew on a couple of buttons to fasten the product or sew on a zipper.
Video: Fur vest in half an hour (Fur Vest)
It will always be warm in an elongated vest. If you work in an office where it is cool in winter and you have to sit on a wooden chair all day, then you will not freeze in an elongated vest and you will feel comfortable.
How to sew an elongated faux fur vest for women - models, pattern:
Beautiful vest made of faux fur under the fox. Comfortable and warm, light and beautiful.


You can cut a fitted model, as in the picture below. But you can sew the product straight cut as in the photo. Just don't cut at the waist.


Men's vests are available in an elongated version, and if your significant other ordered you to sew such a model for him, then get to work. Lay the fur on the table or floor, transfer the pattern and sew the seams - simply and quickly.
How to sew an elongated faux fur vest for men - models, pattern:
This model is now at the peak of popularity. A large and comfortable hood serves as an excellent decor for this modern and beautiful thing.


You can cut out such a model of a vest with a hood. A small fur hood will look great in the image. But such a model is suitable if you sew a vest from fur with a small nap.

If you want to make a large hood with a yoke, then tailor the vest separately, but longer than in the drawing below, and then sew on the rest of the details.

Pattern of a hood and coquette.


Girls are big fashionistas. They demand either a dress, like a sister's, or a fur coat, like a mother's. If you have some free time, make a beautiful vest for your daughter from any faux fur.
How to sew fashion vest from artificial fur for children for a girl - models, pattern:
An interesting model of a children's vest - in gray color- for the little princess, and in black - for the robber.

The pattern is done quickly. Do it first on big sheet paper, then cut out and transfer to fur. Cut out the fur back and shelves, sew. Your daughter will definitely like this thing - comfortable and beautiful.


The boy will be happy to walk in a soft fur vest, especially if his mother or grandmother makes it. You can come up with your own models: with pockets, with a hood, with a collar and so on. The pattern of the simplest model is taken as the basis.
How to sew a children's faux fur vest for a boy - models, pattern:
Such a product is made of a material of two colors. Make the edging around the edges from any black material: knitwear, leatherette or leather.


Pattern for such a vest. First of all, pockets and inserts on the shoulders are cut out. It is enough to leave 1 cm for the undercuts. There is no need to make a collar for such a vest, it will interfere with the child.


Do you consider yourself a fashionista? Do you want to make some new thing with your own hands? Sew a fox or arctic fox vest. Rest assured that no one else will have such a thing. The product will be original and fashionable. Stylish model and pattern:
Silver fox vest. It turned out very original and stylish.

The back and sides of this vest are made of leather. You can sew a leather product according to the pattern, and sew a strip of natural fur on top along the entire length of the bar.


Mink is a noble and expensive fur. If you have been wearing this beautiful fur coat for many years and you want a new vest, sew it from a fur coat. Use a fur coat for sewing if it is already worn and has lost its original appearance on the sleeves and hem. Otherwise, it is better to wear a fur coat, as it is warmer and more comfortable than a vest.
So, you have decided to make an interesting sleeveless jacket from a long fur product, feel free to proceed. How to sew a mink vest - model, pattern:
Such a mink product can be worn over a synthetic winterizer jacket - fashionable and beautiful. A short flight of fur is obtained if you sew a vest from patches. You can sew the flaps by hand with a furrier stitch. In the video below, see how to properly sew with this type of seam.
 How to sew a mink vest: models, pattern How to sew a mink vest: a beautiful model
Rabbit fur is one of the affordable types of fur. A rabbit fur coat does not last long. If you have such a fur coat, and it already looks ugly, sew a vest out of it. Rabbit fur is soft and fluffy, so the product from it will be pleasant and comfortable to wear. How to sew a rabbit vest - model, pattern:
Stylish vest from a gray rabbit. The gate stand is made in the form of a rectangle. The collar is sewn to the finished product.


Collarless black rabbit vest. Looks attractive, stylish and fashionable.


Wear your new vest open, tied with a belt or buttoned up. Many women use a beautiful decorative brooch. Wear a fur vest with turtlenecks, trousers, and a pencil skirt. The image, thanks to the new thing, will be unforgettable.
Video: how to sew a fur vest with your own hands?
Over time, fur products both go out of fashion and wear out. It is impossible to sell such things, but it becomes a pity to throw them away. In this case, you should think about how to return the old fur coat new life. To do this, it is not at all necessary to resort to the help of an atelier; with a little imagination and creativity, you can solve this problem yourself. In this article we will look at what can be done from an old fur coat.
Fur coat preparation
First of all, it is necessary to assess the degree of wear of the old fur coat, to consider the shiny places, areas of wear. To do this, you need to rip off the lining and make a thorough inspection of both the fur and the skin.
Important! Sleeves are most prone to wear at the elbows. On the shoulder seams, the fur is wiped off from wearing the bag. In addition, the location of the fastener, collar, hem, especially long models of fur coats, over time, have a not very pleasant shiny look.
Therefore, it is necessary to eliminate all damaged areas of the fur. To do this, you need to use an ordinary tailor's ripper. With the help of it, we steam and discard all damaged areas, after which we steam the shoulder and side seams of the assembly of the old fur coat.
What can be done from a faux fur coat?
Now consider the remaining fur and try to determine what can be done from an old fur coat.
Fur vest
You can easily change an old fur coat to an original fur vest. Such a transformation is subject even to those who do not know how to sew professionally.
For this procedure, you need:
- lining fabric,
- stationery sharp knife,
- several large sew-on buttons.
Important! You can not use scissors for the process of ripping an old fur product.
How to make a fur vest from an old fur coat with your own hands:
- To build a vest pattern, you need to take measurements of the volume of the chest, waist, hips and choose the desired length. This marking can be done from the inside of the fur.
Important! To indicate the size, you can use the finished product with a sweater, cardigan, knitted sweater.
- According to the found dimensional points ballpoint pen we outline the silhouette, while adding one and a half centimeters to the hem from all sides. From the bottom of the product add 4-5 cm.
Important! It is necessary to cut out such a product from the wrong side, while not forgetting about the direction of the fur.
- Next, you need to sweep all the seams with long stitches, try on the product. If the vest fits in size, then you need to cut the lining fabric according to the same “pattern”.
- We sew large buttons in place of the planned fastener, after that we make a neat hem of the lining fabric, sew it to the finished fur product.
Important! An elegant look of such a product is given by a combination with elements of leather, suede or textiles. The use of belts at the waist allows such vests to look beautiful and stylish.
What can be done from a muton fur coat?
Mouton fur coat for many years perfectly retains its appearance. Over the years, the style of this product becomes old-fashioned, and each of its owners has to wonder and decide what can be made from a Mouton fur coat.
Important! When solving this problem, it must be taken into account that the fur is very dense and too “heavy”. Therefore, the simplest option with the manufacture of a vest is not entirely suitable. Such a vest will not look elegant, but rather bulky, therefore, for this alteration option, it is preferable to use “light” furs that have a fluffy pile - a fox or mink will do.
In addition, the muton is very difficult to sew. This process requires special sewing equipment, so you will have to turn to the services of a qualified specialist.
Mouton fur coat can be converted into a short fur coat fashionable style. From a wide hem, you can make a hood or cut out new version sleeves. You can also add new original elements.
Important! Genuine Leather, suede perfectly combined with mouton fur. For decoration, you can use fluffy fur made of arctic fox or fox. The bright additions made create a new style, give the created Mouton coat a stylish look.
What can be done from a zigey coat?
The historical name of the muton is the cynomolgus. Such fur is not entirely suitable as decorative elements for bags or shoes. What to sew from an old fur coat? From an old zigey fur coat, you can make original blankets and even carpets.
Despite the apparent complexity, the technological process of their creation is very simple. Only need free time and the use of ordinary needlework skills:
- First of all, the zigzag coat must be completely ripped, while leaving the side seams.
- All damaged areas must be removed.
- After that, we turn on the fantasy and start assembling a new fur fabric like a puzzle, trying to pick up the missing elements of the product according to the shape.
Important! You need to sew zigey fur from the wrong side.
As a result, the plaid turns out to be an “irregular” fantasy shape. You can save this option by processing the edges of the product with an oblique trim. And you can cut the made plaid, giving it the shape of a rectangle and sheathe the edges with a satin ribbon in the same way.
Important! If the old zigey fur coat is of high quality and the fur is soft and plastic, then you can sew home slippers or make real uggs.
What can be done from a mink coat?
It is very difficult to say goodbye to an expensive mink coat that is heavily worn and out of fashion. But keeping such a thing in the closet does not make sense. Mink fur is very plastic, almost any new product can be made from it.
Important! First of all, we steam the lining material and evaluate the quality and volume of mink fur from the inside and from the outside. Over time, the fur dries out and the fur that is ideal on the outside is not always suitable for alteration.
What can be done from the old mink coat?
- Mink fur, especially uncut, is ideal for sewing hats, berets, hats in the form of "cubes".
- From mink, you can make original fur scarves that look spectacular not only with a coat, but also with an evening dress.
- Having shown creativity and imagination, anything can be made from an old mink coat. Also, mink fur is ideally used as an element of decor. It is used for processing the edge of the hood, collar area or cuffs on various outerwear.
- Mink has practically no competitors when decorating bags. Any leather and boring bag model can be transformed in just 20 minutes if you add a new mink fur decor element.
When contacting a qualified specialist, you need to decide in advance which option for rework is right for you. 
Long model
If the mink model is elongated, then you need to create a new product to the maximum. You can change such a fur coat into a short fur coat, using combinations with other elements of leather or suede.
short model
From a shortened mink model, you can make a fashionable vest. In this case, you don't even need to redo anything:
- We cut off the sleeves, eliminate all the damaged areas of the fur and fantasize with the neck and clasp.
- It is imperative to put a new and bright lining material.
- Then choose a spectacular version of the belt or belt, and a completely new stylish product appears.
What can be done from a nutria coat?
Nutria fur is very durable and warm, in addition, it is characterized by water-repellent properties and perfectly tolerates wet snow and light rain. To remake an old nutria coat, you need to fully appreciate the quality of the fur itself.
Important! Nutria fur has a small area of tender underfur. A significant part of it consists of a rather stiff and long main fur, which makes it especially relevant to a possible alteration old model fur coats.
In order to determine what can be made from a nutria coat, it is necessary to evaluate the dressing of the fur itself.
Processed fur
If the fur is “trimmed” or “plucked”, then it is characterized by a soft and plastic structure. In this case, such a fur coat can be altered in the same way as in the case of a mink product, while creating fur jackets, vests and jackets. Like a mink product, nutria goes well with elements of leather, suede and even knitwear. Any fluffy fur is also perfectly combined with nutria fur.
A stylish and spectacular look is created by stoles, capes and coats, which are knitted from nutria fur. This is a rather complicated type of needlework technique, which is inaccessible to a person without certain professional skills. You can find a master who can transform an old product.
raw fur
If a nutria fur coat is sewn from raw fur with a long pile, then in order to remake an old product, you need:
- Rip open an old nutria coat.
- Assess the degree of damage and eliminate unusable areas of fur.
- From the remaining volume of fur, select a model for redoing.
Important! Without fail, it is necessary to adhere to the direction of growth of the fur, which in any case must “lie” strictly vertically. This distinctive property of furs with a long pile contributes to a significant limitation of the possibility of cardinal transformation and combination of details.
Nutria is much better and better than other furs, withstands the dyeing process. Any professional dry cleaning can give the created product a new juicy shade.
Important! It is unacceptable to perform the staining process at home.
If there are suitable pieces of nutria fur left, then you can decorate the leather version of the bag or give shoes the new kind. For this procedure, you only need high-quality glue and the presence of creative thinking.
Interesting options for reworking an old fur coat
In addition to the usual vests, sheepskin coats and hats, there are many more interesting options for using an old fur coat. It can be perfectly used both for decorating old things and interiors, and as a basis for new original things.
Rugs from an old fur coat
The old version of the fur coat can always be converted to any rug with a variety of sizes and shapes. Such a product is easy to make with your own hands. A fluffy and soft rug made of an old fur coat, located by the bed, creates a feeling of warmth and comfort in the rainiest weather of the cold season. The shape of such carpets is diverse - both ordinary squares and rectangles, and all kinds of ovals and very intricate circles can perfectly fit into the interior of the room.
Important! The presence of imagination allows you to create masterpieces in the form of flowers or imitate a hunting trophy in the form of the skin of some “killed” animal.
Having torn the old fur coat product and removing all unsuitable parts of the fur, we begin to assemble a new product in random order. Having formed the desired shape of the rug, we sew on the wrong side, the lining fabric.
Important! For the manufacture of rugs, there are no special requirements for the degree of deterioration of the old fur coat.
Fur bag
From fur you can make great designer accessories that are perfectly combined with each other and are constantly at the top. fashion trend. Alteration of an old fur coat allows you to create an exclusive version of a handbag, which will be in a single copy. What it will be: patchwork, roomy, or vice versa small - depends on your preferences. 
To make a fashionable little thing, you must have the following attributes at your disposal:
- drawing paper or an ordinary sheet of cardboard - used as a template for a future handbag;
- leather elements - necessary for combining with fur, since the skin is much better able to withstand loads, it is used when moving from one piece of fur to another;
- intact patches of fur;
- lining material;
- zipper of the required length;
- scissors and chalk for drawing.
Having prepared all the necessary components, you can begin the process of converting an old fur coat into a new stylish accessory:
- As in previous cases, it is necessary to prepare the details of the fur. To do this, we cut them out according to the pattern, not forgetting to leave allowances for the seams, having previously eliminated holes and other wear elements.
- After that, carefully sew all the details.
- When sewing on the lining fabric, care must be taken in advance and leave space for sewing with the handle of the bag and the zipper.
- If the fur at the fastener interferes, it must be slightly trimmed.
Important! You can decorate our handbag with several details, while adding other pieces of fur, interesting straps, original fasteners.
Thus, you become the owner of a stylish little thing.
Headphones, leggings, mittens
What can be done from an old fur coat? If the old fur coat has a large wear area, then the option of making a major alteration is impossible. In this case, you can make small stylish accessories.
The sleeves can be easily and quickly converted to leggings. In this case, it is necessary to sew on the lining material from the wrong side. Since it is undesirable to stretch the gaiters, you need to insert a zipper.
Small patches of intact fur will fit on mittens. And from very small pieces of fur you can make interesting option headphones.
Toys
Also from an old fur coat you can make various Stuffed Toys. This manufacturing process is suitable for skilled needlewomen with a rich imagination and the presence of elementary knowledge and skills in cutting and sewing.
Important! Various animals in the form of cats, bears, bunnies, hedgehogs, mammoths are obtained as very beautiful toys.
Things for the home
You can also make all kinds of aesthetic crafts for household use from an old fur coat. From undamaged pieces of fur, soft covers for chairs and ottomans, pillowcases for furniture elements and blankets made from fur pieces look great.
Important! More complex options include the creation of various still lifes. Such compositions consist of a dish on which fur products are located in the form of flowers, ordinary balls, squares or brooches. Also interesting are still lifes that imitate any element of the interior in fur design.
Fur scarf or coat collar
If you need to make a fur scarf or a new coat collar, then you need to choose only good pieces of an old fur product.
Important! Patched patchwork holes and small upgrades are not suitable, as such accessories are constantly in sight and are designed to attract attention. Therefore, even small flaws will be instantly noticeable and spoil the appearance of the updated product.
In addition, it must be borne in mind that not every fur is suitable for a scarf and collar. In this case, the collar and scarf made of fox, chinchilla, which are soft and fluffy, look perfect.
Animal clothing
What can be done from an old fur coat? You can make clothes for pets from an old fur coat. In practice, this is a remake of the same leggings and vests made of fur, only much smaller. Having chosen unspoiled pieces of fur according to the preliminary dimensions, we make a “new” fur coat for our favorite animals.
Insoles and slippers
The easiest option for making from an old fur coat is shoe insoles. For them, there are no restrictions and requirements for the quality of the fur. Converting an old fur coat to shoe insoles is the most extreme option when the fur coat is badly worn and has many holes and damaged areas.
Important! Since the fur takes up a lot of space when making insoles from an old fur coat, it means that the size of the shoe is reduced and there is less room for the legs. In this case, the fur must be trimmed.
Bijouterie
Making jewelry from an old fur coat is a rather complicated option.
Important! Such a manufacturing process implies an amazing sense of style and excellent needlework skills. It is not enough just to make jewelry from fur, it is necessary to maintain their compatibility with each other, as well as harmony with the clothes for which they are intended. Otherwise, the made jewelry looks tasteless and rude.
We hope that our ideas of what can be made from an old fur coat came in handy, and you have found a practical application for even a thoroughly worn out thing.