Perhaps you won’t find a cheaper material for New Year's crafts than plastic utensils. You can use everything:
- plates
- cups
- bottles
- spoons and forks
Disposable plates and cups made of paper are suitable for crafts.
In this article you will see photos of absolutely simple jewelry for home interiors and Christmas tree toys made from plastic and paper dishes.
So what can you do? from plastic and paper plates so that it is simple, fast and at the same time unusual, bright and non-standard? Let's fantasize together!
First of all, prepare it yourself plates, A also tools and materials , which will be needed for work. The plates must be intact and clean. The color can be any. The following tools and materials may be useful to you:
- scissors
- stapler
- glue gun and glue sticks for it
- felt-tip pens or markers
- gouache or acrylic paints
- glue type “Moment Crystal”
- PVA glue
- tassel
Let's start with something simple: let's do “decoupage” of a plastic (or paper) plate . Glue the top layer of a three- (or two-) layer napkin onto the plate using PVA glue and a brush. When the napkin is completely dry, coat it with acrylic varnish. The New Year's plate is ready!

If you don't have a dark green paper plate, a white one can easily be painted with gouache or acrylic paint. Let it dry well and cut it into three isosceles triangles. Glue the resulting parts into a Christmas tree shape. You can make a hole at the top and tie twine in the form of a loop. Such Christmas trees decorate curtains or wall. Don’t forget that it’s customary to decorate any Christmas tree. In our case, small beads, sequins or buttons are suitable.

We use the same technique - cut the plates into triangles. Now from the resulting triangles we will make checkboxes. If you take colored plates, the garland of flags will be more elegant.

It is not necessary to paint the back of the plate if you do not intend to hang the flags so that they will be visible from both sides.

It's not at all difficult to cut out of white paper or plastic plates. Christmas angels . See for yourself: a few cuts with scissors and the silhouette of an angel is already emerging.

If you want to make the figure three-dimensional, look at another method: using a felt-tip pen, draw lines along which we cut out the wings and robe of an angel. Then we bend the lower part of the plate so that we get a “skirt” and secure it with a stapler.

Of course, plates make wonderful snowmen. It doesn't take much effort either.

The plates are easy to fasten with a regular stapler or glue with hot glue. Several of these snowmen hung around the apartment will decorate your home and create

The plates are easily pierced with an awl or hole punch. Thread strong twine or rope into the resulting holes and make it together with your children. a garland of funny snowmen.

A New Year's clock ? What, if not plastic or paper plates, can they be made from? Don't know where to get numbers for the dial? You can take it from children's sets of letters and numbers. Usually these are alphabets with numbers. To make your “clock” also show minutes, take two plates of different sizes and glue them together. On the outer plate, beautifully write the minutes with a felt-tip pen, and on the inner plate, stick the numbers to indicate the hours.

If you can’t find the numbers anywhere, you’ll just have to draw them on the plate. Make the arrows and pendulum from cardboard.

And how many fun New Year’s “faces” can be made using plates. Firstly, this Father Frost.

And secondly and thirdly and... everyone you come up with yourself.

For the New Year, let them “settle” in your son’s children’s room pirates.

From small colored plastic (or paper) plates, make "lollipops". They look elegant and can be hung like a garland.

New Year's wreath made of paper or plastic plate Even a child can do it. You just need to cut out the middle, paint the resulting headband in the desired color and glue on the decorations.

Easy to make from plastic (or paper) plates "fairytale" animals: Sivka-Burka, for example.

And the symbol of 2017 is young cockerel, is made from half a plate, a mug cut from the other half, two “eyes”, several feathers and “palms” made of colored paper.

If you don’t know how to pack small gifts in an unusual and special way, also use plastic plates. It turns out original bunny handbag. You can make a bear bag in the same way.

That's probably enough about plates. Let's move on to other material for New Year's crafts - plastic cups. If you didn't have time to buy snow globe, which symbolizes the arrival of winter and the New Year holidays, do something similar with your own hands.

Take a plastic lid or cut a circle out of cardboard (it is important that the size matches the diameter of the glass). Look around the house for small figurines (usually found in chocolate eggs). Glue them to the lid using hot glue from a glue gun or Moment type glue. Sprinkle grated foam or small white beads, coconut flakes, broken eggshells, semolina, and finally! Here we go New Year's fairy tale came to you! Place it on the windowsill or on a small table. Believe me, it lifts your spirits! Yes, you can also lightly moisten the side surfaces of the glass with water and sprinkle with a small amount of granulated sugar. Let it dry and you will get a “snow-covered” glass.

Watch this video, maybe it will inspire you or give you something new idea how to decorate your house for the new year.
Maybe you decide to do snowman from plastic cups . It turns out BIG and absolutely wonderful.

How can you do it BIG SNOWMAN from plastic cups, watch in this video.

Do flock of penguins can be made from bottles of different heights. You don't even need to cut the plastic here. Just insert it rolled into a tube inside the bottle white sheet paper or white plastic bag. And cut out the “black plumage” from black colored paper.

If you don’t throw away plastic bottles for a long time, then by the New Year you can easily afford to make something like this from the bottoms. You can use strong wire. You will have to make holes in the plastic with a hot awl or a drill with a thin drill bit. It will work out

Another option wreath of plastic bottles It turns out very elegant. You can’t even tell right away that this unusual wreath is made practically from garbage. In this case, each bottom of a plastic bottle is cut out in the shape of a flower with sharp petals. All blanks are painted with gold paint from a can or other suitable for plastic. Assemble the blanks into a wreath on a strong (thick wire) using an awl or drill.

A simple Christmas tree garland can be decorated with plastic flowers. To do this, you need to cut off the necks of plastic bottles, but do not throw away the corks. Drill holes in the plugs equal to the diameter of the mini-cartridges of the Christmas tree garland.

What else can you make from plastic bottles for the New Year? Certainly, candlesticks. In this case, two bottle bottoms were used: one larger, the other smaller. Cuts were made in the plastic and the blanks were heated over an open flame. Then the cut and heated strips were bent into different directions. When the blanks had cooled, hot (or “Moment”) glue was applied to the edges and sprinkled with glitter. For the candle, we prepared a glass bowl with colored bath salts. Plastic candlesticks were stacked on top of each other, and a bowl with a candle was placed inside. Everything is ready!

You can see another way to make plastic candlesticks in this video.
And in this video you will see wonderful New Year's crafts made from plastic spoons and forks.
That's all! Get ready for the holidays, decorate your home! After all, family happiness always comes to the house where it is expected!
For joint creativity You can use almost any available material with your child, including disposable tableware. Such crafts will interest any child. And their ease of use allows you to create crafts with young children.
Children's crafts from disposable paper plates
Paper plates are the most popular. The fastest and easiest way to use them is to paint the plates with colored pencils, felt-tip pens or paints. You can decorate plates with plasticine by sculpting funny animals or smearing the surface of the plate to create a design. Using colored paper allows you to create various animals (turtle, ladybug, dog, spider) and even carnival masks for children's improvisation.
 |
 |
|
 |
 |
 |
 |
 |
 |
For example, you can create a lion mask by painting the plate itself yellow and drawing a face inside.

You can complicate the task and use not one plate to create animals, but several.
Craft "Owl"An older child can easily create an owl from several plates. To do this, you need to stock up on colored paper, paints, a brush, two disposable plates, glue and scissors.

Toys made from paper plates can be used in play activity child and invite him to play in a puppet theater.
Paper plate Can also be painted and used as a photo frame or cookie holder.
If you add ribbons to paper plates, you can create beautiful jellyfish.
Craft "Frog"To create a frog you need to prepare:
- scissors;
- glue;
- colored paper(red, black and white);
- paints;
- brush;
- a glass of water;
- two molds from an egg carton.


DIY crafts from plastic plates for children.
In addition to disposable plates white You can use multi-colored plastic plates that do not need to be painted. You can create crafts from them almost immediately. For example, by cutting out fish from colored plates, you can create a large aquarium.
You have a lot lying around at home plastic dishes and you don't know what to do with it? Our advice to you, do not throw it away under any circumstances, because from such improvised material, which looks quite primitive, you can create some kind of decorations for your home with your own hands. New Year's holidays. This way you will save money and reveal yourself as a talented person. And the atmosphere of celebration in your home will take on the proper appearance. With such basic things, you will have a unique opportunity to show off your individuality in front of your guests and family. So, let's take a look at our article, which will provide you with 4 photos of ideas for wonderful crafts from disposable tableware on New Year 2020 made with your own hands extremely quickly and easily. Without having the skills of this skill, you can freely acquire them with the help of our master classes containing easy-to-understand information.
Snowman from a disposable cup
Snowmen are now being made with their own hands for the New Year 2020 from just about anything. One more interesting idea considered a craft made from a disposable cup.
To do this you will need:
- Disposable tableware - cups;
- Colored paper;
- Scissors;
- Glue;
- Paints;
- Brush;
- Textile.
Work progress:
- Since the cup is white, there is no need to repaint it. On its surface you need to draw eyes, nose and mouth. For the toy, you need to make a hat and scarf from fabric. To make these products hold more firmly, you can use glue.
- It is best to make arms, legs and buttons from colored paper and glue them to the surface. It turned out to be an excellent snowman for the New Year 2020, made with your own hands from disposable tableware. This craft is quite suitable for children to make on their own.
Video: master class on making a snowman from disposable cups
Christmas tree made of plastic spoons

A simple master class will be interesting for both children and adults. The result is beautiful craft in the shape of a Christmas tree, created with your own hands for the New Year 2020 from disposable tableware. As you can see in the photo, its appearance is more reminiscent of a purchased toy than a home-made one.
To do this you will need:
- Plastic spoons;
- Cardboard;
- Scotch;
- Acrylic paint;
- Brush;
- Scissors;
- Hot glue gun;
- Christmas tree decorations.
Work progress:
- You need to make a cone out of cardboard and secure it with tape. After this, the spoons need to be painted green and give it time to dry. The handle of each product must be cut off and the part with which it is eaten will be used for the Christmas tree. The cone itself should also be coated with acrylic paint.
- Then, using a glue gun, each spoon must be attached to the cone. You need to do this until the entire Christmas tree is covered in green branches. You can attach a ready-made star to the top or make it yourself. And over the entire surface you need to glue bows, beads and other decorations. A wonderful Christmas tree is ready that will look very beautiful absolutely anywhere. When creating such a craft from disposable tableware for the New Year 2020 with your own hands, you can use other instructions, because there are many ways.
Vase made from disposable straws

You can make a beautiful vase from ordinary straws from juice or other drinks. It turns out to be a very beautiful craft for the New Year 2020, made with your own hands from disposable tableware. This is not just an unusual decoration for the home, but also useful, since you can put artificial flowers in this kind of vase. All this will perfectly decorate the room.
To do this you will need:
- Lots of colored disposable straws;
- Plastic bottle;
- Glue;
- Decor.
Work progress:
- The top of the bottle needs to be cut off and will not be needed for this craft.
- The bottle must be covered with disposable tubes, alternating colors. When the work is finished, the product will delight you, because it contains a lot bright colors. To decorate a vase made with your own hands from disposable tableware, you can use various decor: ribbons, beads, rhinestones, etc. For the New Year 2020, such a product will become truly excellent and relevant, because the abundance of bright rainbow colors will significantly improve the mood of the entire environment.
Video: master class on making a vase from disposable straws
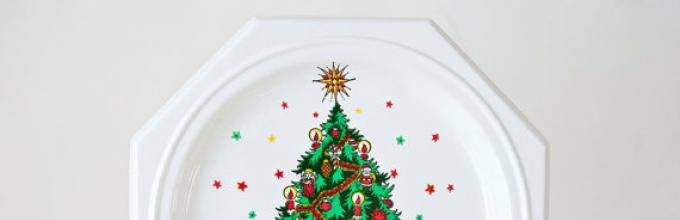
Decoration from disposable plates

If you are in doubt about what kind of crafts you need to make from disposable tableware for the New Year 2020 with your own hands in order to perfectly decorate your home, we invite you to familiarize yourself with our excellent idea, which we hope you will like. This decoration, made from disposable plates, can be hung either on the wall in your apartment or placed neatly on the chest of drawers as a decorative item. If there is a desire and children, then it would be nice to present this product kindergarten in the form of a present.
For production you will need:
- disposable plates;
- glue;
- gouache paints;
- brushes;
- decorative elements: cotton wool, rhinestones, sparkles, bows and much more.
Work process:
- First think about what you want to create: either a snowman, or Santa Claus, or a deer. Everything is at your discretion.
- Take an easy-to-use brush and paint the image of a fairy-tale character of your choice with paints.
- Then decorate it, if necessary, with cotton wool, glitter or anything else. For example, you can refer to the ideas presented in the photo. A great option, quite cheerful and colorful. Make your wishes come true and get excellent crafts for the New Year 2020, created with your own hands from disposable tableware.
Finally
So you have found out how you can create a variety of crafts from disposable tableware for the New Year 2020 with your own hands in an original and simple way. Transform your home in a chic and interesting way and the owner of the coming year, the White Metal Rat, will reward you with good luck, prosperity and great happiness. Happy holiday, dear friends! All the best to you!
Recently, handmade home decorations have become popular. One of the most common are DIY crafts made from disposable plates. Disposable tableware can be not only a convenient and practical household item, but also an excellent raw material for creating decorative items, accessories and all kinds of gifts.
Masks are a mandatory attribute of many children's parties, performances, and games. One of the most favorite among children of different ages are animal masks. Disposable paper plates can become the basis for making a wonderful “panda” mask that will delight every child.
To make a panda mask you will need:
- paper plate;
- black two-color cardboard;
- pencil;
- glue;
- scissors;
- clothespins;
- hole punch or awl;
- braid or elastic band.
Master class on making a panda mask from paper plates:

- Take a paper plate and cut half of it.
- Trace the glue stick onto the workpiece. These will be the future slits for the eyes.
- Carefully cut out the slits.
- Draw two large circles on black cardboard. You can use a cup as a stencil. These will be the future ears for the mask.
- Cut out the ears outlined on the cardboard.
- Glue the prepared ears to the base of the mask. Use PVA glue for connection. To make the ears stick better to the base, secure them for a while with clothespins.
- Draw a panda's face with black paint.
- Trim the bottom of the blank to round the mask.
- Make holes on the sides of the mask with an awl or hole punch. Thread a ribbon or elastic band into the holes so that the mask can be worn.
Such a mask, of course, will delight every child.
Gift “ship” for February 23rd from paper plates
As you know, February 23 is a significant day for every man. It is on this day that all representatives of the stronger sex want to receive something special as a gift. The ideal option would be to make DIY crafts from disposable tableware. The main advantage of such gifts is that they can be made together with children. One of the gift options for February 23rd could be a boat made from plates with your own hands.
To make a boat you need:
- paper plates;
- long wooden skewer;
- scissors;
- glue;
- paints;
- stapler;
- colored paper.
Master class on making crafts with your own hands on February 23:
- Take one of the paper plates and color it blue. Let dry thoroughly. This will be the sea on which the boat will sail.
- After the paint has dried, cut a long hole in the middle of the plate that matches the length of the bottom of the plate.
- Take the second plate and paint it any other color and dry it. Then bend it in half and secure it at the edges with a stapler. This will be the deck of the ship.
- Insert the resulting deck into a pre-cut hole in a plate prepared under the sea.
- Carefully insert a wooden skewer into the middle of the ship's deck.
- Cut out a triangle from colored paper and place it on a skewer, alternating punctures at the top and bottom. You should get a sail.
- Cut out a flag from a small piece of colored paper and glue it above the sail.
- Decorate the boat as desired decorative elements, draw waves on the sea with white paint.
Any head of the family will be delighted with such a craft made from disposable plates, made especially for him loving family with your own hands in honor of the Defender of the Fatherland holiday.
Garden decoration “cat”
 Garden decorations have always been very popular among gardening enthusiasts. This is not surprising, because it is thanks to decorations that you can make a garden unique and create the necessary mood in it. Unfortunately, not everyone can afford to buy garden decorations, as it is too expensive. However, DIY crafts made from plastic plates can be an excellent alternative to garden accessories. One of the options for such garden decorations is a cat made from plastic plates.
To make a garden decoration “cat” you will need:
- plastic plate;
- dye;
- adhesive colored paper;
- scissors;
- stapler;
- glue "Moment".
Master class on making a cat for the garden:
- Take a plastic plate and carefully cut a piece out of it. The resulting workpiece should have a moon-shaped shape. This will be the body of the cat.
- From the remaining piece of plastic, carefully cut out a small arc that will be the tail, a circle and two small triangles for the muzzle and ears.
- Connect the circle and two triangles together to create a cat's face. Carefully secure with a stapler.
- Paint parts of the cat's body with paint. It is better to paint in several stages so that the color is richer. Let it dry.
- Connect all parts of the cat's body with a stapler.
- From adhesive colored paper, cut out the eyes, nose and whiskers for the cat. Stick it on the face.
Making this jewelry takes very little time, and the result exceeds all expectations. The made cat will be a wonderful decoration for any garden, giving it a fabulous atmosphere.
DIY crafts made from disposable tableware are a great way to express yourself and be creative.
Taking the most ordinary disposable plate as a basis, you can create a truly unique thing that will delight both the owner and those around him.
"Making African animals from paper plates." Master class with step-by-step photos.
Description: master class is intended for parents, educators, teachers primary classes, teachers additional education, creative people. During this simple master class we will learn how to create animals such as zebra, tiger, giraffe, and leopard from scrap materials.Purpose: craft, gift, applique.
Target: making crafts from waste materials, development of creative abilities in teachers and parents.
Tasks:
- Introduce one of the options for making crafts from paper plates
- To cultivate artistic and aesthetic taste, patience, diligence and accuracy in work.
- Develop labor skills and abilities.
- Develop fine motor skills
- Develop aesthetic taste
- Develop creativity and creativity
Required materials:
- disposable paper plates
- felt-tip pens
- PVA glue
- colored paper and cardboard
- acrylic paints
- tassel
- scissors
- officer ruler or other ruler with form templates

Work progress.
1. In order to make a zebra, on a sheet of black paper we outline all the necessary patterns with a felt-tip pen - 6 stripes (2 * 5 cm), 1 large circle (4 cm) for the nose, two small circles (0.8 mm) for pupils, two parts for ears.

2.Cut out all the drawn details.

3.C right sides We glue 3 strips to the plate, at an equal distance from each other. We bend the ends of the strips and glue them to the back of the plate.


4.Glue the remaining three strips symmetrically on the opposite side.

5.Glue a large black circle-nose at the bottom of the plate.

6.On a sheet of white paper, draw two large circles (2.5 cm) for the eyes and two small circles (1 cm) for the nostrils.

7.Cut out the drawn parts

8. Glue two eyes in the middle of the plate, and two nostrils on the black circle of the nose. Glue the pupils over the eyes


9.On a sheet of white cardboard we trace two parts of the ears. Draw a rectangle (4*6 cm) on a sheet of black cardboard. Draw strips approximately 1 cm wide on the rectangle.

10.Cut out the parts. On the black rectangle we make cuts along the stripes, without cutting to the end.

11.Glue the black parts to the white ears.

12. Turn the plate over and glue the ears and mane to the reverse side.

13. We turn the plate over again and this is what we should get. Zebra is ready!

14. Let's start making a giraffe. Turn the plate over and paint the reverse side with acrylic paints or yellow gouache.

15.On a sheet of brown paper, draw circles of different diameters. Cut it out.

16. Glue the circles onto the plate in random order.

17.Draw an oval-shaped nose on brown paper. Cut out the parts and glue them to the bottom of the plate.


18.On a sheet of white paper, draw and cut out 2 circles for the eyes. From black paper we cut out two small ovals for the pupils, and two larger ovals for the nostrils.

19.Glue the eyes and nostrils in place.

20.From yellow cardboard we cut out two parts for the ears and horns.

21.Cut out 2 large circles and several small ones from brown paper. Glue them onto the ears and horns.

22.Glue the ears and horns with reverse side plates.

23.Draw a mouth with a black felt-tip pen. The giraffe is ready!

24.Now let's start making the tiger. Color the paper plate orange.

25.Cut out ten triangle strips from black paper.

26.Glue three strips to the plate on the left and right sides, one strip on the bottom and three strips on top.


27.On a sheet of white paper, trace and cut out 2 large circles for the eyes. From black paper we cut out two small circles for the pupils and an oval-shaped nose.

28.Glue the eyes and nose to the plate.

29. Cut out 2 large triangles from orange cardboard - for the ears. Cut out 2 small triangles from black paper. Glue the black triangles on top of the orange ones.


30.Glue the ears on the back of the plate.


