Elena Vybina
Folding the St. George's ribbon(master class)
Soon we will celebrate the 71st anniversary of Victory in the Great Patriotic War! On the eve of the holiday, I decided to make beautifully folded St. George's ribbons. They will decorate our white blouses and shirts at the holiday, and after that the guys will go to the Victory Parade with them!
I hope my explanation will be clear.
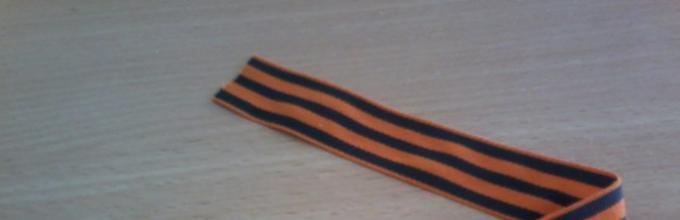
Cutting off ribbon measuring 20-25 cm(for testing it is better to cut it longer)

bend the right edge (slightly at an angle)


And simply bend the left side down from behind, straighten all the parts evenly and neatly tapes.

Can be glued with Moment glue (crystal). But I sewed it with thread, carefully along the black stripe. Then we will attach them to blouses and shirts with pins. Here is the result of my work!

Thank you for your attention!
Publications on the topic:
PURPOSE OF THE MASTER CLASS: to contribute to improving the skills of teachers through the implementation of active forms of work. OBJECTIVES: to introduce teachers to.
Origami is the art of folding paper figures. It originated in Japan. In ancient times, origami had a religious purpose.
April 12 is Cosmonautics Day! In 2016 - 55 years since the first manned flight into space! We decided to coincide with this event.
This is an exciting opportunity to try yourself as a true watchmaker and decorator. And to breathe life into your new ones.
Good afternoon! Today I offer you my bullfinch master class. Winter has come, an amazing time of year. For some, this is a long-awaited time.
Traffic light. Before starting work, we remember the rules of the road, what color we can cross the road with, and why we need it at all.
The fact that people remember their significant exploits. An awkward and shameful moment is the realization that, having acquired such a valuable attribute, you fall into extremes from not knowing how such a precious symbol should be tied beautifully and correctly.
First let's determine where it appears would be appropriate: on the handles of a handbag, a side mirror, on a car antenna, in the form of a symbol - decoration with a bow on clothes.
It is prohibited to decorate with the St. George's ribbon: hair, dog collar, jeans belt. According to traditions, the St. George Ribbon is required to be pinned to communities whose relatives were touched by the war years; citizens who know and understand what the price was for the taste of triumph and happiness of subsequent generations; remembering and filled with pride for their homeland and its ancient past. This symbol of Victory should not be used as a regular decoration.
It is also unacceptable to use it inappropriately. For those who do not want to break traditions and show disrespect for military personnel, there are tips on how to use the St. George Ribbon, correctly form it into a bow and attach it.
How to tie a St. George's ribbon

1. First, place the tape on a straight surface and grab it by the right end.
3. A similar process must be carried out with a different ending.
4. Without additional fastening, such a bow cannot hold its shape and will open, so we punch it in the area where the limbs cross with a sewing pin and at the same time fasten it to the surface of the garment.
5. Hold both ends of the ribbon with your fingers.
6. Place the left end on the right, then move it near it and pull it out at a right angle with right side the end of the tape is down, and from the left - up.
7. This creates the starting node.
8. Then place the lower end in such a way as to form a semi-bow.
9. In the next step, you need to take a half bow with the other unused end and tighten it into the loop almost to the end to create the next half bow.
10. Finally, pull both loops horizontally in opposite directions, after which you need to tighten the knot.

Scheme of how to tie a bow using an elastic band:

Now the bow - the symbol has come to completion, we attach it to outerwear, purse, or to the car. Create your own symbol - the St. George Ribbon and wear it in honor of Victory Day and as a sign of memory of the fallen soldiers and pride in your Fatherland.
How to beautifully tie a St. George ribbon (bow) - video
For the first time, the St. George ribbon was established by Catherine the Second to encourage the courage and bravery of soldiers during the Russian-Turkish war. Many years and more than one war have passed since then, but the St. George ribbon still remains a symbol of courage, bravery and fortitude. And today this insignia has another, no less important symbolism - a manifestation of deep respect and gratitude to all those who made victory over fascism a reality. But, like any other symbolic sign, St. George's ribbon must be worn correctly. In our article today we will tell you how to tie the St. George ribbon correctly and beautifully.
How to wear the St. George ribbon on May 9?
There are several options for how to wear the St. George ribbon on Victory Day. The first and easiest way is to fold the ribbon in half and make a loop. You can also secure the ribbon to your outerwear by folding it in the shape of a V, which symbolizes victory. You can also wear a ribbon in the form of a “lightning bolt”, forming it into something like an inverted letter “I”. Other simple and effective ways to tie the St. George ribbon on May 9 are waiting for you below.

How to tie a St. George's ribbon correctly - step-by-step instructions
This is a very simple method for which you will need the ribbon itself and a regular pin. If desired, instead of a pin, a ribbon tied using this method can be sewn to outer clothing.

Required materials:
- St. George's ribbon
- pin
Step-by-step instructions on how to properly tie the St. George ribbon:
- Lay the tape horizontally on a flat surface.

- With your fingers right hand We fix the middle, and with our left hand we take the right edge of the tape.

- Fix the edge with your fingers approximately in the middle of the tape.

- Hold the edge and take the opposite one.

- We bring it to the middle of the tape.

- We overlap the first end of the ribbon and straighten the middle a little to make a small bow. We fix the edges of the ribbon with a pin.

DIY brooch made from St. George's ribbon for May 9, master class with photo
The next method will require your creativity and a little time. But your St. George ribbon, or rather, a real brooch in the shape of a five-pointed star, will definitely attract the admiring glances of others.

Necessary materials for a brooch made of St. George's ribbon:
- grosgrain ribbon (width 2.5 cm, length 1 m)
- scissors
- glue gun
- brooch (clasp)
- felt base (circle 6 cm in diameter)
- decor for the middle (button, bead, pearl)
- tweezers
- candle
Step-by-step instructions for making a brooch from the St. George ribbon:
- Cut a piece of ribbon 11 cm long. Fold it in half and form a small loop on top.

- We clamp the workpiece with tweezers at the base and cut off the uneven edges.

- We burn the edges of the workpiece over an open candle fire.

- For the brooch we will need 5 such blanks.

- We form a star from the blanks. We glue them together.


- Glue the decor to the middle of the star.

- Cut another piece of tape about 10-15 cm long. Fold it in half and trim the ends.

- Fix the resulting tail with glue. We also glue a felt base with a fastener to it.


- Finally, glue the star and tail together. Our original brooch made from St. George's ribbon is ready!

How to tie a bow from a St. George ribbon with your own hands - step-by-step instructions
A bow is one of the most popular forms for wearing the St. George ribbon on Victory Day. Therefore, in addition to the first method described above, we suggest you master another variation of a simple bow.

Required materials for the bow:
- St. George's ribbon
- thread or elastic
Step-by-step instructions on how to tie a bow from a St. George ribbon:

You can watch even more ideas and ways on how to tie the St. George ribbon on May 9 in the video tutorial below.
The St. George's Ribbon got its name back in 1769 (and not since the Second World War, as many people think) when Catherine II introduced the highest army award, the St. George's Cross. But even then, the tape reasonably had only two colors and exactly 5 stripes. It is generally accepted that these colors convey the life of St. St. George the Victorious and embody resurrection and death. According to legend, Saint George died 3 times and was resurrected 2 times.
Recently, it has become popular to wear a bow from the St. George's ribbon on the eve of Victory Day. If you want to make it at home yourself, then there are no difficulties in tying the St. George’s ribbon.
How to tie a St. George's ribbon? Scheme with possible ways:

10 ways to tie the St. George Ribbon (video lesson):
How to tie the St. George Ribbon - 6 main methods (photos step by step):
General attention is presented to ways of tying a classic bow from the St. George ribbon to wear on a sweater or other clothing on the chest.
1. The easiest way to tie a St. George Ribbon is to make a loop where one end is shorter than the other.

2. To make a bow, we make a large loop and connect its middle to the place where the ribbons cross.

3. We make a bow as in the previous version, only we fasten the middle with an elastic band.

4. Bend the ribbon in half, shorten one end and shape it into a check mark.

5. Fold the ribbon in three to make one strip, then stretch the upper end to the right.

6. Bend the ribbon in four, then stretch the upper end to the right, and the lower end to the left. To make the letter "M".

How to wear the St. George's ribbon correctly, without defaming the symbol?
The tied St. George's ribbon is worn on the left side of the chest near the heart or tied in a double knot around the sleeve or on the wrist. We should not forget that the St. George ribbon is not an element of style, but a symbol of respect and pride for the feat of our ancestors, that everything said about the war is not forgotten by us and remains in a secluded corner of the heart, and patriotism for the Motherland was passed on to us with mother’s milk. Today, every person who has tied the St. George’s Ribbon is another small symbol of the great victory over Nazi Germany.
Why is the St. George's Ribbon needed in modern times?
Currently, the St. George's Ribbon is a charitable public event, which is dedicated to Victory Day in the Great Patriotic War. Patriotic War. Since 2005, the organizers have determined the goal of this action is “... at all costs, not to let new generations forget who and at what cost won the most terrible war of the last century, whose heirs we remain, what and who we should be proud of, who to remember...”.
It’s very annoying to see people who came up with the idea of tying a St. George’s ribbon instead of laces or a belt, attach it to the collar of their pets. This is not just a fictitious symbol of the holiday. The ancestors had to earn the right to wear the St. George Ribbon, as well as be awarded the Order of St. George. Therefore, we should not forget the true purpose of this ribbon as the highest military award Russian Empire and treat her and the memory of her grandfathers and great-grandfathers with reverence and respect. It is necessary to respect those who fell on the battlefield, who gave everything for the victory of the Motherland.
Despite the fact that even the organizers of events for distributing St. George ribbons suggest tying them to handbags, car antennas or wrists, it would be more correct to honor the memory of soldiers and show respect to veterans - to pin this symbolic sign on the chest from the side of the heart, so as not to desecrate it.
The St. George ribbon is most often fastened to clothing as badge on the lapel. The simplest way– fold the ribbon in the shape of a loop or zigzag (the best option for a short ribbon) and pin it to the clothing with a safety pin, piercing the ribbon itself in the overlap area. A simple bow from a St. George ribbon can be easily obtained from the previous version: fold the ribbon into a loop, as in the photo above, and then pull the top of the loop to the overlap (intersection) of the two ends of the ribbon and pin the center (the most layered part of the bow) to the clothing with a pin. The center can be tightly wrapped with thread (orange or black) vertically, then the bow will be more elegant. This bow is made from three pieces of ribbon. If you want the bow to be 15 cm in width and height, cut two 30 cm ribbons and one small one (its length should be twice the width with a small margin):- Cut corners on one long strip on both sides.
- Scorch all raw edges of all pieces of tape with fire so that they do not “creep”.
- Fold the second long piece in the shape of a circle (connect the edges at the bottom with a slight overlap), flatten the middle of the tape so that it is exactly above the junction of the two ends. Stitch with thread or use a glue gun to secure the piece.
- Wrap a short piece around the middle of the workpiece so that the edges of the piece meet on the reverse side, sew or glue the edges and fasten the elements together. This is the base of the bow.
- Fold the piece with the cut edges into an “L” shape and attach the top of the corner to the back of the bow.
- Fold the long ribbon into a circle, connecting the edges at the bottom.
- “Flatten” the sides of the circle so that you get a “figure eight”. Temporarily secure the contact point with a needle or pin.
- Squeeze the figure eight vertically so that the top, the fastening needle and the junction of the edges are clearly under each other. You will get a double bow. Baste or glue the joints, remove the needle.
- Wrap a short piece of ribbon around the center of the bow, securing the joint of the edges to the back of the workpiece.
- Fold the remaining free long ribbon into a loop, as in step 1, and attach it to the crossing point. back side bantha.
- Lay the 40 cm long end on the table and hold the rest of the tape in your hand.
- Lay the next layer in the opposite direction, measuring approximately 25 cm.
- Fold the ribbon in a zigzag, shortening the side by 3-5 cm each time.
- At the last stage, leave a “tail” 15-20 cm long from the center of the bow.
- Secure the middle with thread or a safety pin.
- Place the ends of the tape with a corner and secure in this position.
- Cut out the corners along the edges and singe.
- Fold the St. George ribbon 30 cm long into a figure eight, as in the photo, and secure the joint of the edges.
- Wrap a short piece of ribbon around the center and sew it into the workpiece on the reverse side.
- From two black ribbons 25 cm long, fold the bases of the bows (the ends are joined from the bottom in the center) and connect the blanks together with a cross.
- Attach a St. George ribbon bow on top of the black “cross”.


